Upload Photos
The Inntopia RMS Photo Tool is an easy-to-use tool for managing both your company and product photos. You can use the Photo Tool to upload, edit, assign, sort, and delete photos representing your company and your products. This article describes how to manage all aspects of your photos in Inntopia RMS.
Tip: Read how to maximize the effect your photos have on potential guests in this blog post: Five Easy Ways to Turn Lookers into Bookers.
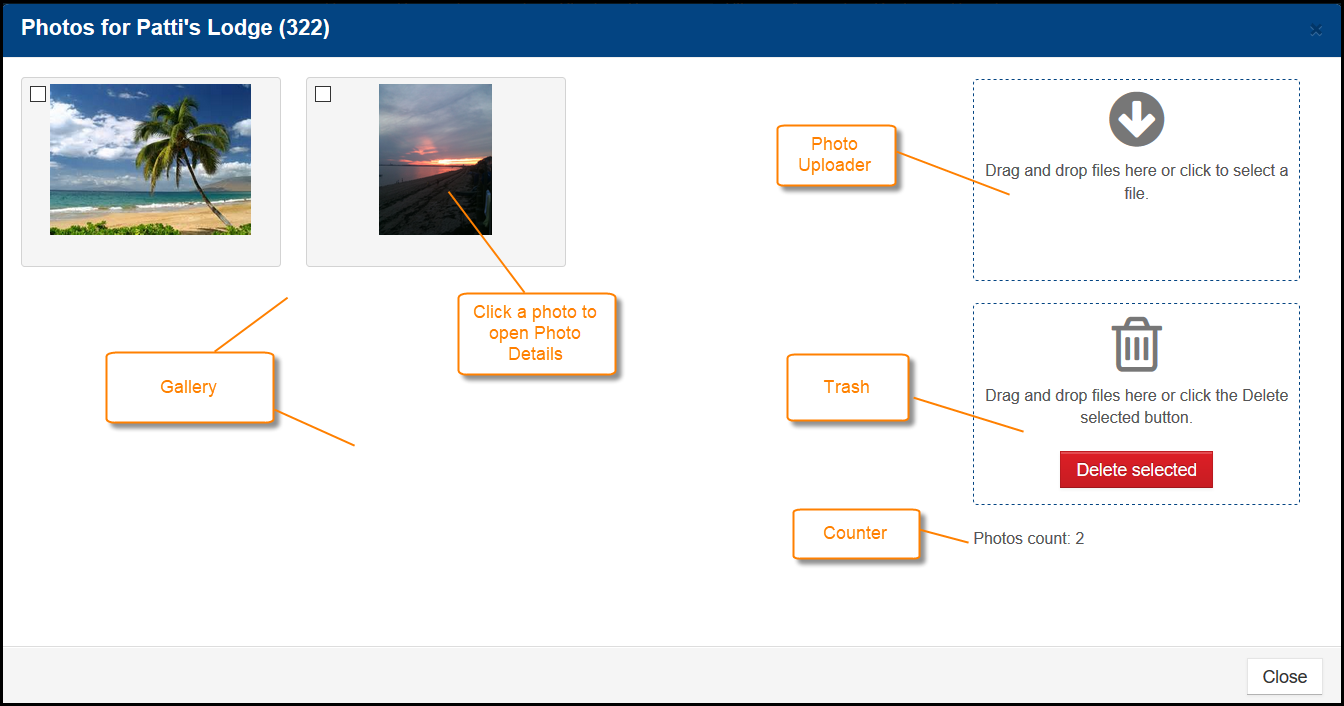
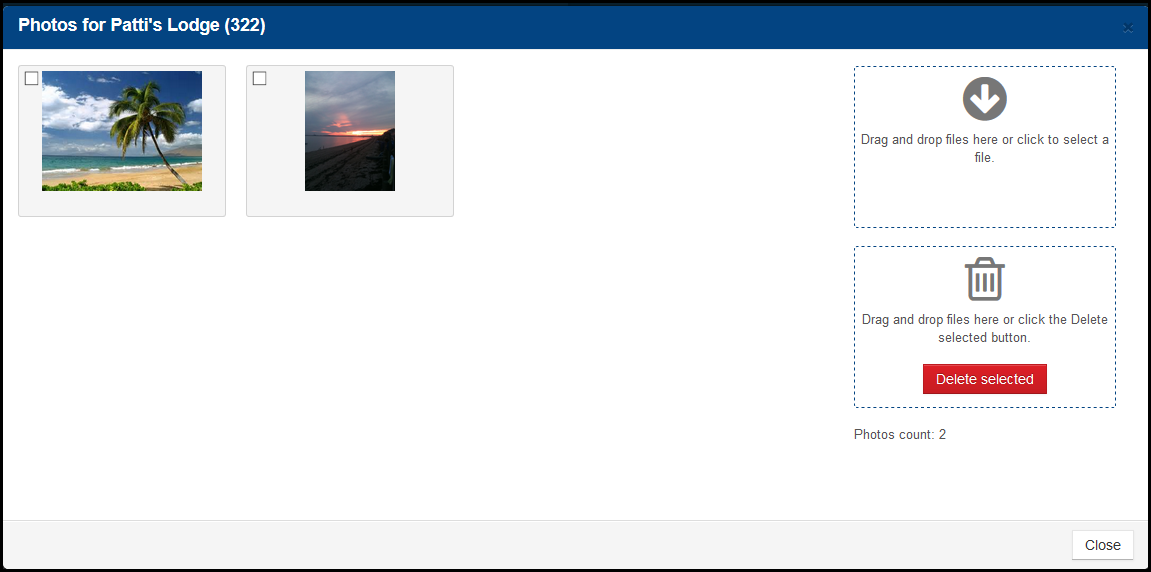
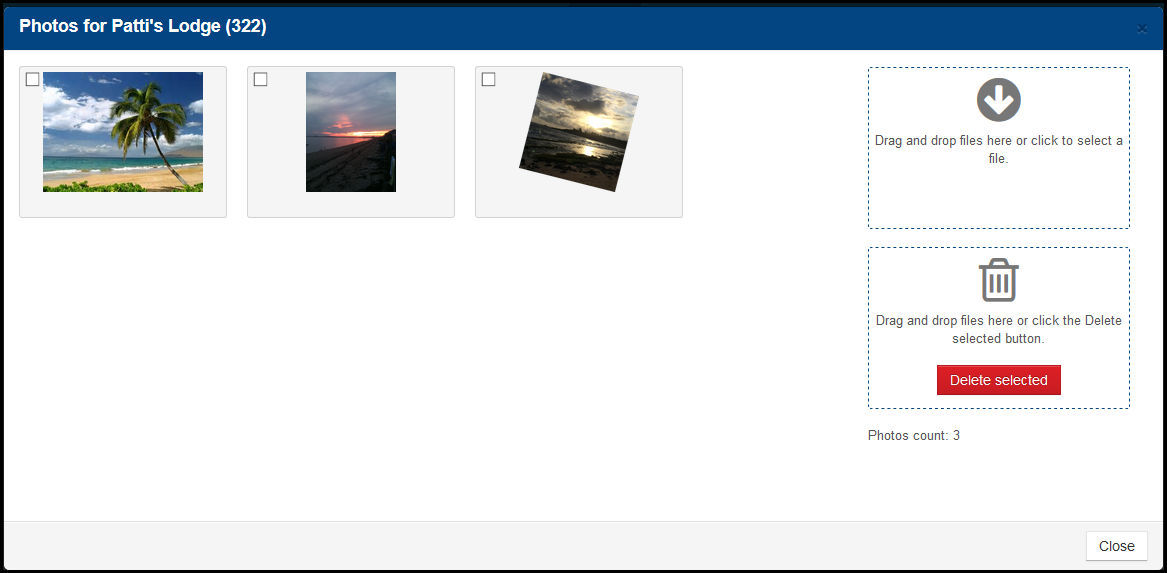
- Gallery – Displays all thumbnails of photos you’ve uploaded and assigned to your company or product. The photos appear in the gallery in the default order in which they appear to customers or agents. However, you can assign a different display sequence to each photo.
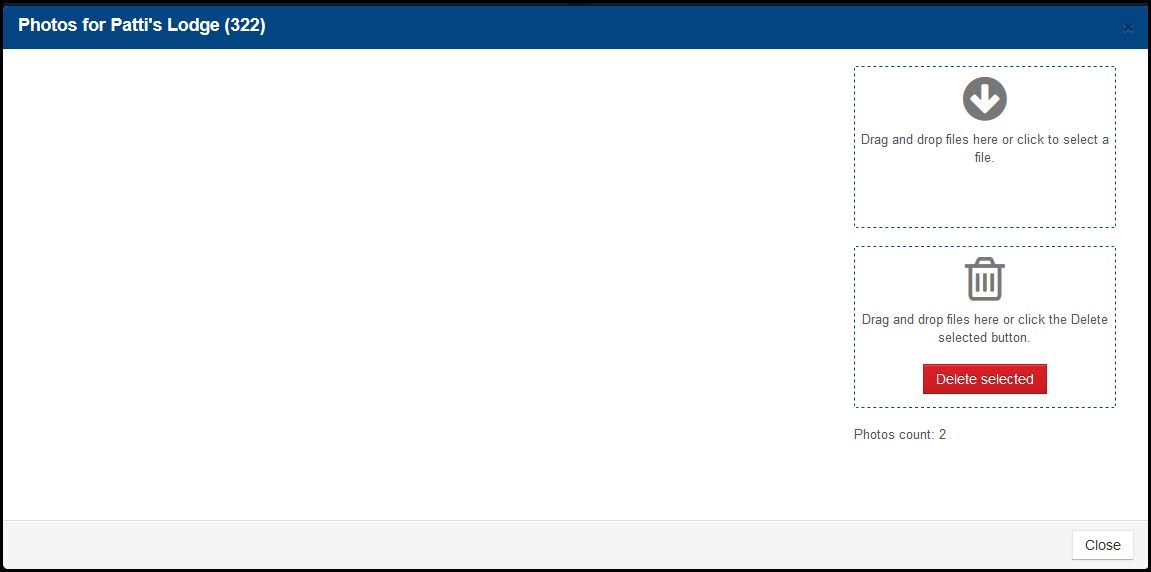
- Photo Uploader – Select or drag image files from your file folder to this box to upload photos. You can load up to 26 photos at one time. Each image must be no larger than three (3) mb. There is no limit to the number of photos that can be uploaded to the image gallery.
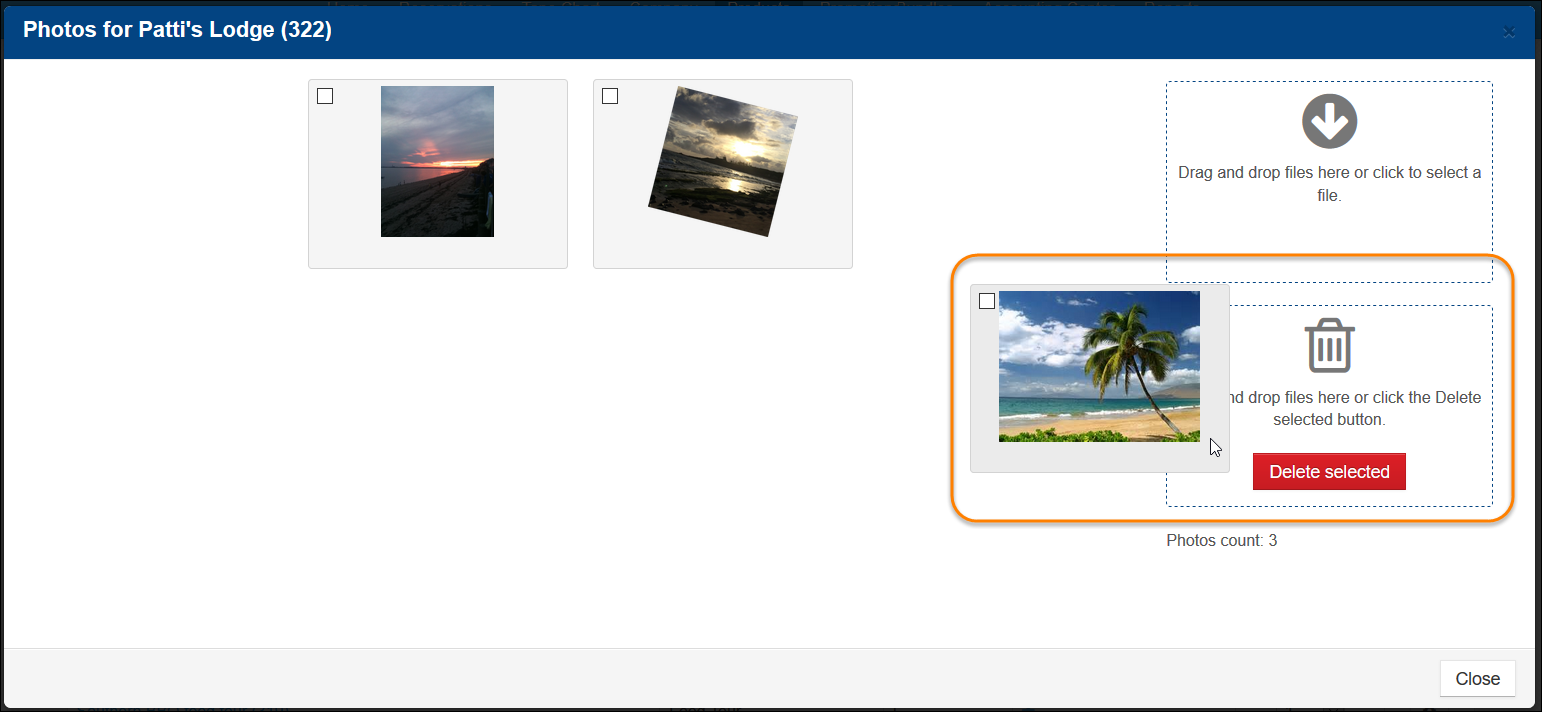
- Trash – Drag or select photos from the photo gallery to delete.
- Photo Counter – Shows the number of photos currently stored in the gallery.
- Photo Details – Edit (resize, rotate, crop), caption, assign, and sort photos.
To ensure your photos appear properly on both standard and responsive devices, Inntopia recommends the following standards:
- Image Sizes – Inntopia eComm is optimized to display the following sizes of photos:
- 840w x 460h or 460w x 300h
Sizes other than those listed above are supported; however:
- Inntopia RMS automatically resizes photos having a width greater than 840w, and
- Images having a width below 300w will not appear in Inntopia eComm.
- 840w x 460h or 460w x 300h
- File Type – Inntopia recommends .png files to ensure images render correctly in all browsers/devices.
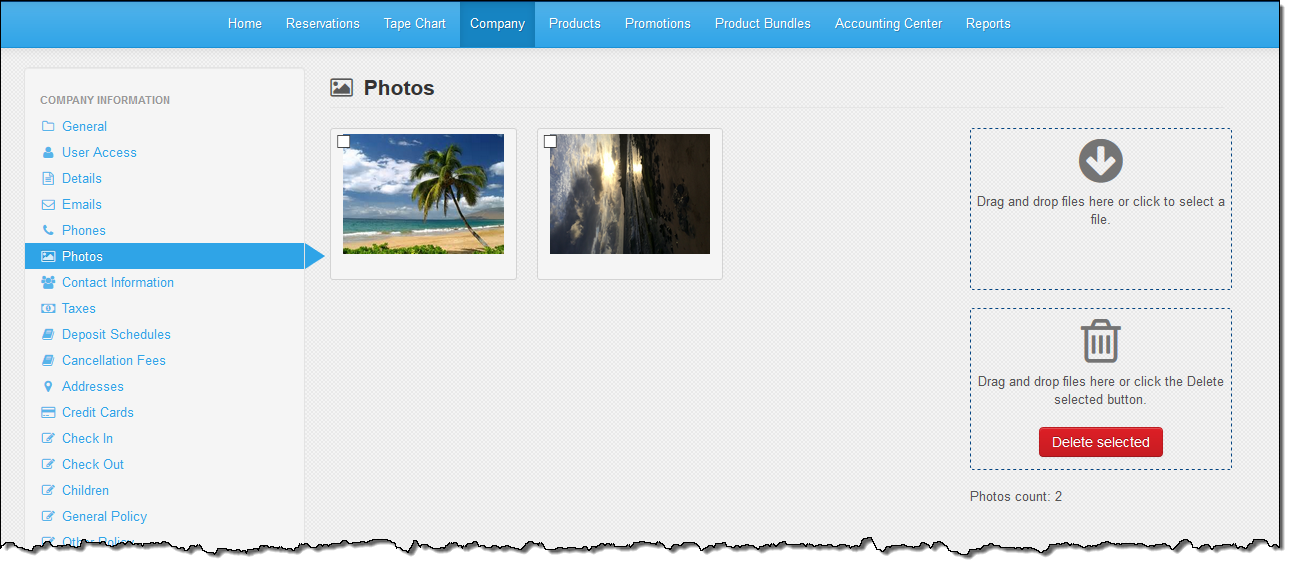
- Log in to Inntopia RMS and click the Company tab.
- Under Company Information, click Photos. The Photos page appears.
- Click inside the Photo Uploader. A file window opens.
- From the file list of your photos on your computer, select up to 26 photos and either click Open or drag the image files into the Photo Uploader. The thumbnail images appear in the gallery.
Note: You have up to seven days from the date a company or product image is uploaded to make edits to it. To make changes to a photo uploaded beyond the seven-day edit window, delete that photo and upload a new version.
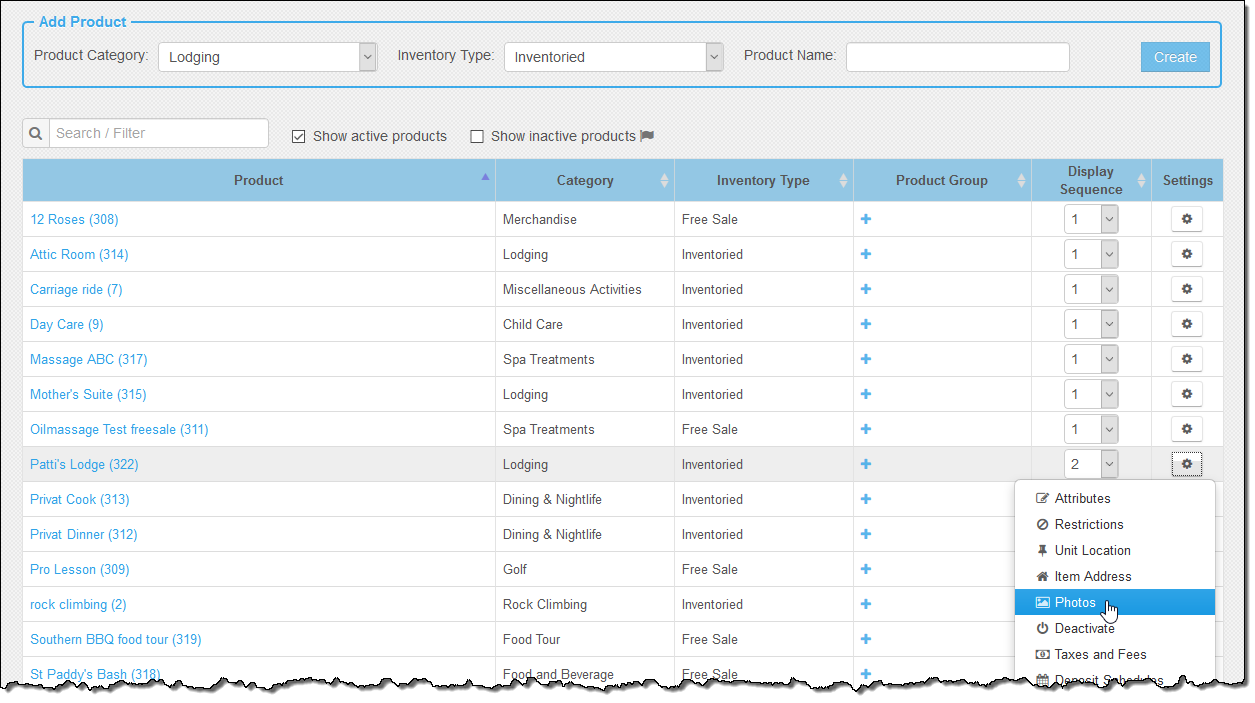
- Log in to Inntopia RMS and click the Products tab.
- In the Products column, find the product for which you want to load photos.
Note: If the product you want to work with is inactive and does not appear in the list, click the Show inactive products box.
- In the Settings column, click the product’s corresponding Settings icon:
 .
. - From the Settings drop down menu, select Photos.
- Click inside the Photo Uploader. A file window opens.
- From the list of image files list on your computer, select up to 26 images and either click Open or drag the image files into the Photo Uploader. The thumbnail images appear in the gallery.
- Change the Display Sequence – By default, photos appear to users in the order in which they appear in the Photo gallery (from left to right). To change the sequence directly in the gallery, click and drag the photos into the desired display sequence from left to right.
The Photos page appears.
You can use the RMS Photo Tool built-in editor to add a caption, change the display sequence of your photos, and assign photos to either a company or a product. You can also resize, rotate, or crop a photo.
Note: You have up to seven days from the date a company or product image is uploaded to make edits to it. To make changes to a photo uploaded beyond the seven-day edit window, delete that photo and upload a new version.
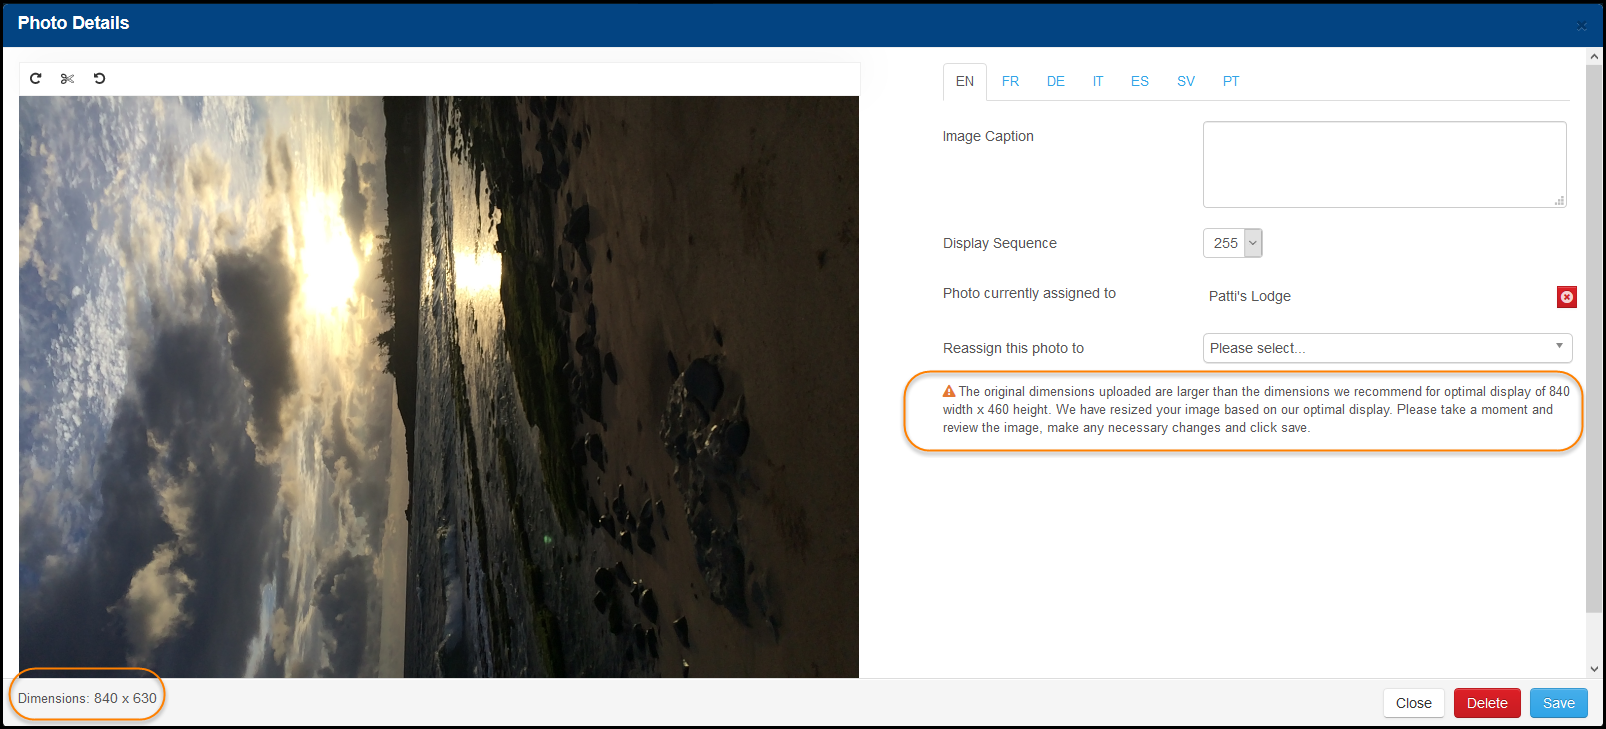
- From the Photos page of either your company or product photos, click on the photo you want to edit. The Photo Details screen appears showing the current dimensions of the selected photo.
- Add a Caption – You can enter up to 80 characters for a caption. If a caption is too long to display in its entirety on your website, users can hover over the partial caption to reveal the entire text.
- Select the language tab of the language in which you want the caption to appear.
- In the Image Caption field, enter the text you want to associate with the image.
- Change the Display Sequence – In the Display Sequence drop-down list, select a number between 1 and 255 to correspond to the position in the display sequence which you want the photo to appear. If you do not select a number, the photos appear in the order in which they appear in the gallery.
- Reassign or Unassign Photo – The Photo Details screen shows where a photo is currently assigned. You can reassign a photo from your company to a specific product, reassign from one product to another, or unassign a photo from a product back to company. When you reassign an image from one company or product to another, the image moves to the Gallery of the newly assigned product and no longer appears in its original Gallery.
- To reassign the photo to a product, in the Reassign this photo to: drop-down list, find and select the product to which you want to assign the photo.
- To unassign a photo from a product back to the company, click the red X to the right of the product name.
- When you are finished making changes to the photo properties, click Save. The Photo Gallery appears with all your changes applied to the photos.
If the dimensions fall outside the Inntopia recommendation of 840 x 460, a warning message appears advising you to resize your image for optimal display purposes.
You can use the photo tool editor to make the following changes to a photo:
- Resize to Inntopia standard dimensions (840w x 460h)
- Rotate clockwise or counter-clockwise either manually or in 90-degree increments
- Crop to eliminate unwanted parts of a photo
- From the Photos page, click on the photo you want to edit. The Photo Details screen appears.
- Resize – To resize a photo without cropping, click the square on the bottom right corner of the photo and drag to the desired size. The dimensions display changes in real time.
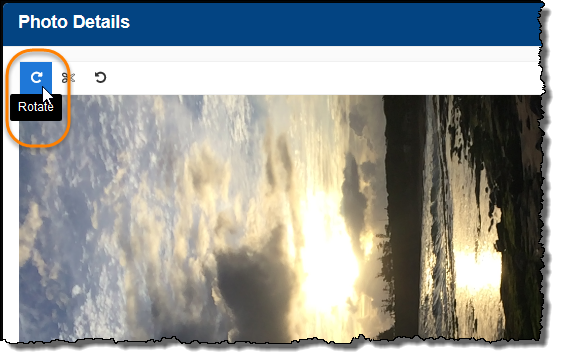
- Rotate – To rotate the image either manually or by 90 degrees:
- In the upper left corner of the Photo Details screen, click the right-facing arrow.
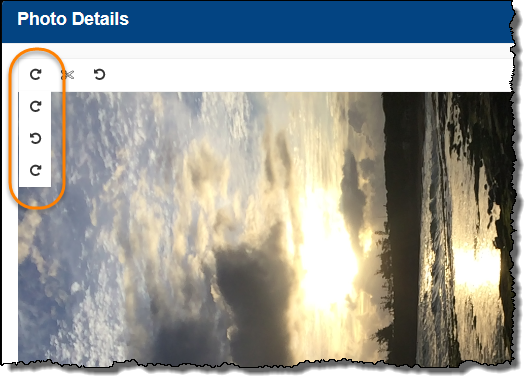
The Rotate tools appear.
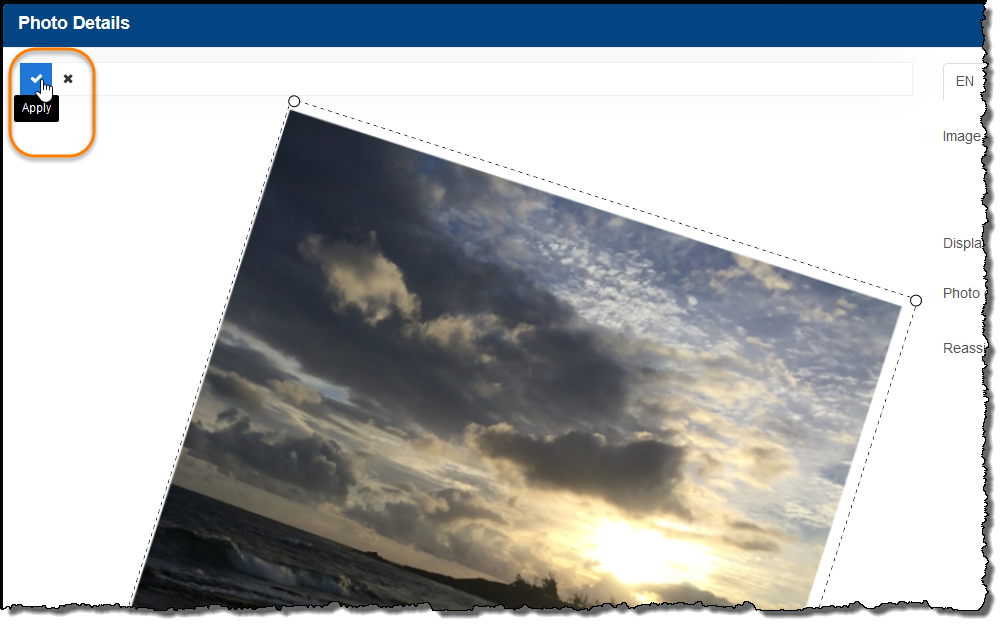
- To rotate manually, click the top right-facing arrow. The photo is highlighted, and check mark and X icons appear in the tools area.
- Use the mouse to grab a corner of the photo and rotate to the desired angle. To apply the rotation change, click the check-mark icon; to reject the change, click the X.
- To rotate left or right by ninety degrees, click the either the left- or lower right-facing arrow depending on the direction you want to rotate the photo.
- In the upper left corner of the Photo Details screen, click the right-facing arrow.
- Crop – To crop an unwanted section of the photo:
- Click the scissors icon. The photo is highlighted, and check mark and X icons appear in the tools area.
- Use the mouse to grab a corner of the photo and drag horizontally, vertically, or diagonally.
- To apply the crop to the photo, click the check-mark icon; to reject the crop, click the X.
- When you are finished editing the photo, click Save. The Photo Gallery appears with all your changes applied to the photo.
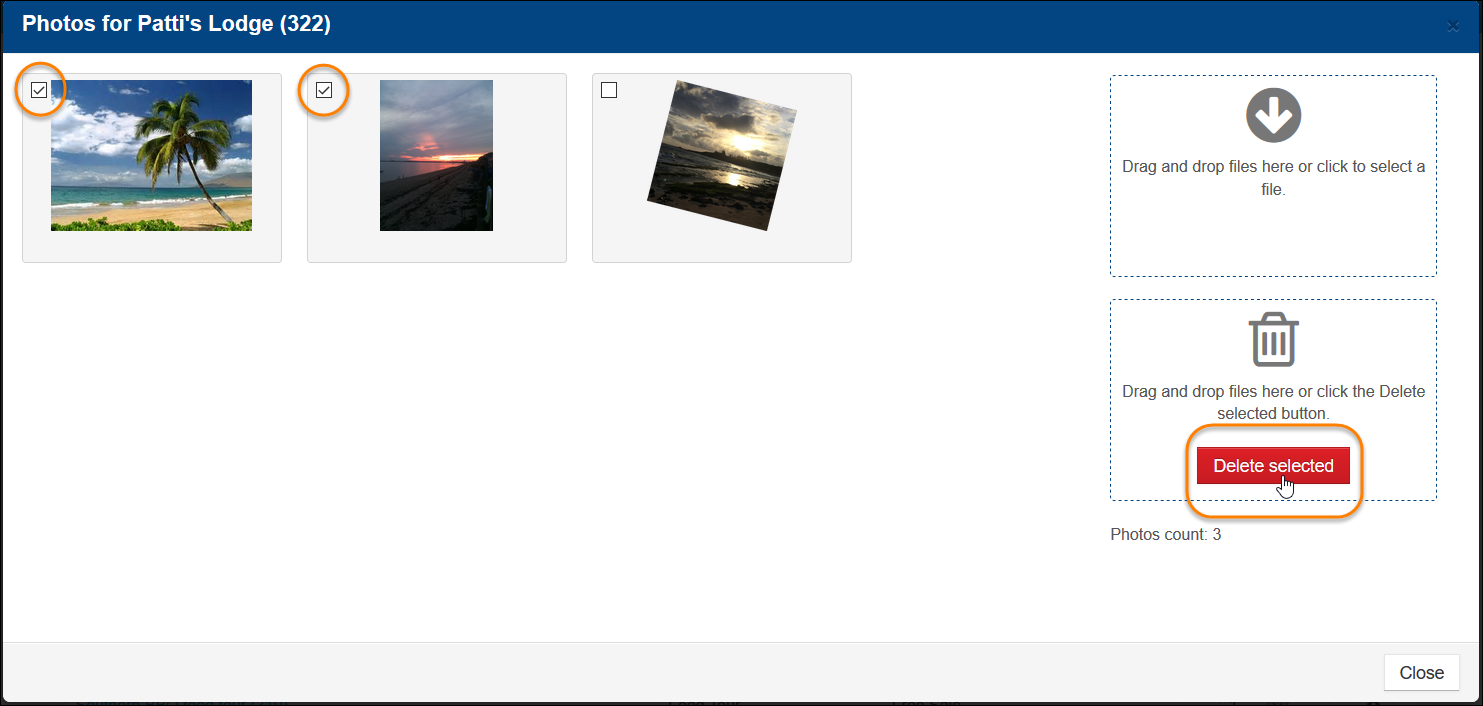
You can delete an individual photo or multiple photos simultaneously. You can also delete photos that contain a broken link and aren't appearing as expected.
There are two methods for deleting an individual photo.
