Reseller Content Management
You can use the Reseller Content Management tool to customize and override the supplier/location short name and description as well as the product name and description. This information appears to both agents and online customers for individual sales channels during searches, check-out, and on confirmation emails. The default information is still displayed for sales channels and products that have had no customized information entered.
The following information can be customized by authorized agents and users:
- Property/Company Name
- Property/Company Description
- Product Name
- Product Description
- Location Name
- Location Description
Note: You can add any combination of customized information for a sales channel. For example, you can add a customized name of a property/company but keep the default description or vice versa. Or, you can add customized content for a product without customizing the company information.
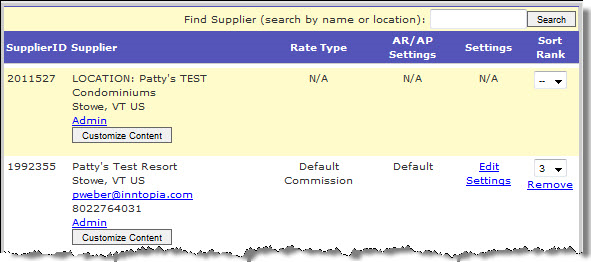
You must request Inntopia staff activate this feature for the specific sales channels for which you want to enter customized information. When the feature is activated and available for use, a Customize Content button appears for that sales channel on the Supplier page.
- Submit an INNTERACT request that contains the following information:
- CRS Sales ID (if you have multiple CRS accounts, designate a “Lead” CRS Sales ID that you will use to enter content that will subsequently inherited by your other sales IDs).
- Each online sales channel ID for which you want to enter customized information.
- Grant System privileges within the CRS Users page to each person within your organization that will be updating content.
Allow five to ten business days for Inntopia to complete setup.
There is no cost to have Inntopia activate this feature.
- From your CRS home page, click the Suppliers tab. The Supplier Management page appears.
- Find the supplier account you want to work with and click its corresponding Customize Content button (if no Customize Content button is visible, this feature has not been activated for your account).
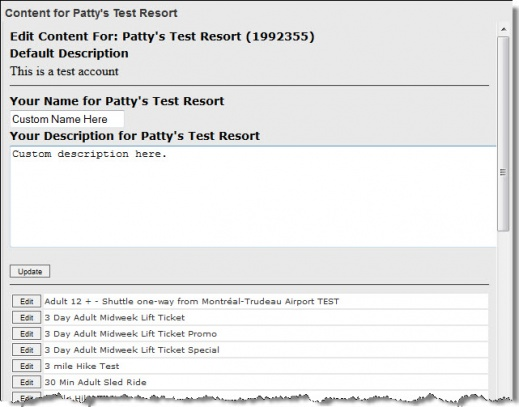
The Content for <supplier name> window appears on the right side of the screen showing the default name and description. The products associated with that supplier are also listed.
- To add a customized name, enter that name in the Your Name for <supplier account> field.
- To add a customized description, enter the description in the Your Description for <supplier account> box.
- When you have finished, click Update.
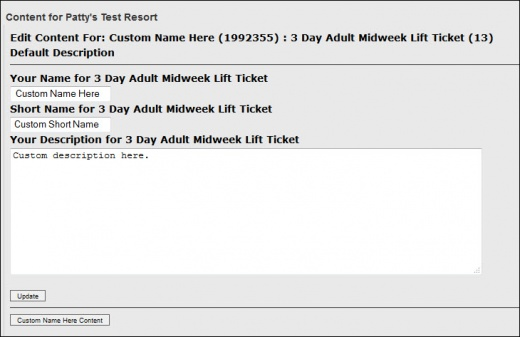
- To customize the name or description of a product, find that product in the list and click its corresponding Edit button. The Edit Content for <product name> screen appears.
- To enter a customized name, enter that name in the Your Name for <product name> field.
- To enter a customized short name, enter that name in the Short Name for <product name> field.
- To enter a customized description, enter the description in the Your Description for <product name> box.
- When you have finished, click Update.
- To return to the supplier list, click the <custom name> Content button.
- To remove customized content, follow the steps above and remove the customized content. The content visible to agents and online guests reverts back to the default supplier content.


