Export List
You can export lists to a .csv file that can be synced to an ESP (Email Service Provider) or used to create email campaigns. You can also export a list directly to an ESP or Facebook Custom Audience. Lists must be saved before they can be exported.
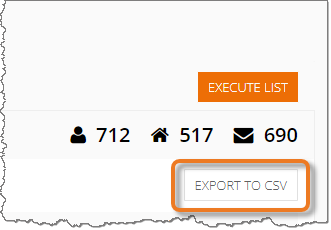
- Open the list you want to export and, on the Results tab, click the Export to CSV button in the top-right corner of the screen.
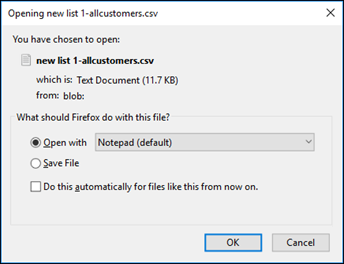
A window appears with options to open or save the .csv file.
- To open the .csv file in a specific program, select Open with and choose a program from the drop-down list. Click OK.
- To download and save the .csv file, select Save File and click OK. The .csv file is saved to the default Downloads folder on your computer or device.
Lists can be directly exported to your Acoustic ESP. Marketing Cloud automatically detects your ESP. To export a list to your ESP, you must first save the list. For information on saving lists, click here.
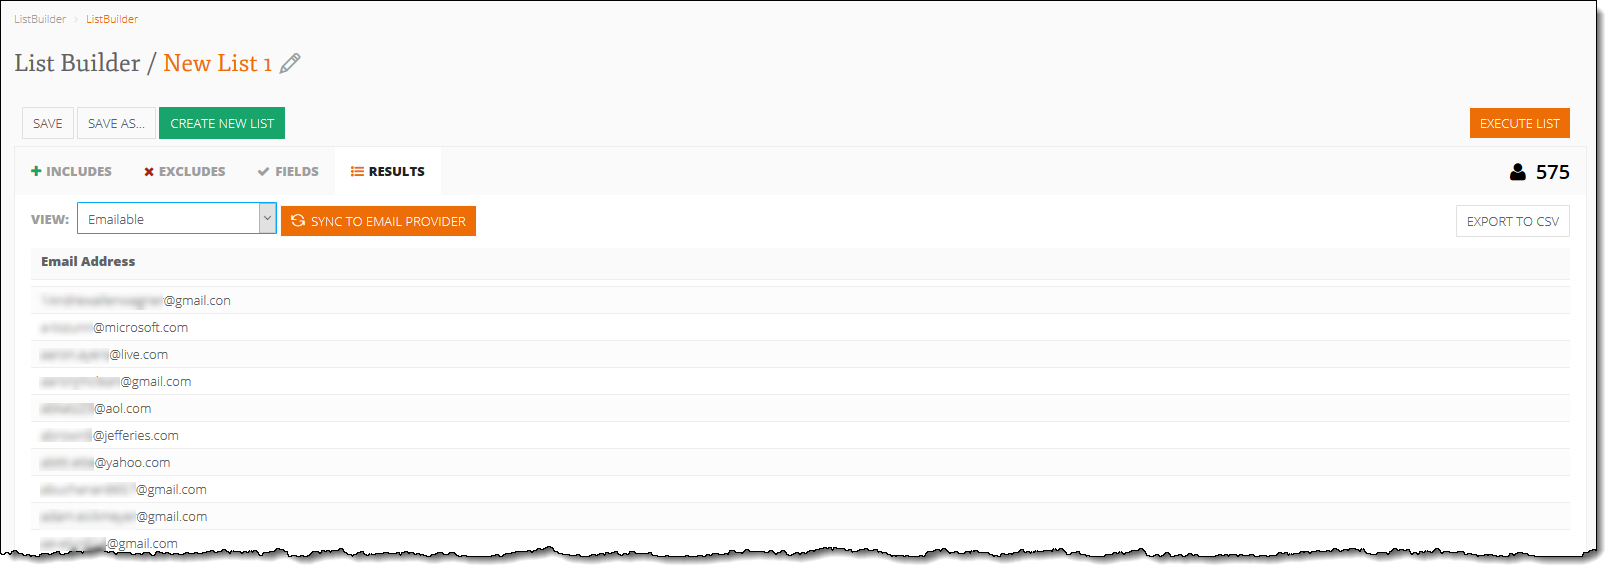
- Open the list you want to export to your ESP and click the Results tab.
- From the View drop-down list, select Emailable. The list changes to display only those records within the list having a valid email address and the Sync to Email Provider button appears.
- To export to Acoustic:
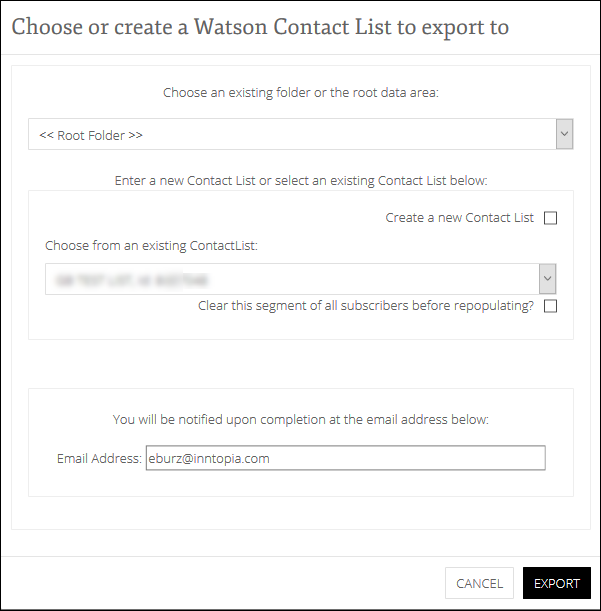
- Click Sync to Email Provider. The Choose or Create a Watson Contact List to export to window appears.
- From the <<Root Folder>> drop-down list, select the folder to which you want your list exported.
- To create a new Contact List, click the Create a new Contact List check box. Enter the new Contact List name in the available field. Otherwise, leave this box unchecked.
- To use an existing Contact List, select it from the available drop-down list.
To remove all current subscribers from the existing contact list before exporting, click the Clear this segment of all subscribers before repopulating? check box. Otherwise, leave this box unchecked. - To be notified via email when the export is complete, enter your email address in the available field.
- Click Export. The list is exported to your Acoustic ESP.
Note: If your Marketing Cloud account uses partitioning, you must export your list to your resort's specific folder. Using the default <<Root Folder>> may not allow you to see the contact list in Acoustic (depending on your user permissions).
Designating a list as Textable and directly exporting the list to Mobiniti allow you to push all the SMS opt-ins on that list to your mobile Mobiniti account as a new SMS group.
- Create or open the list you want to export to Mobiniti and click the Results tab.
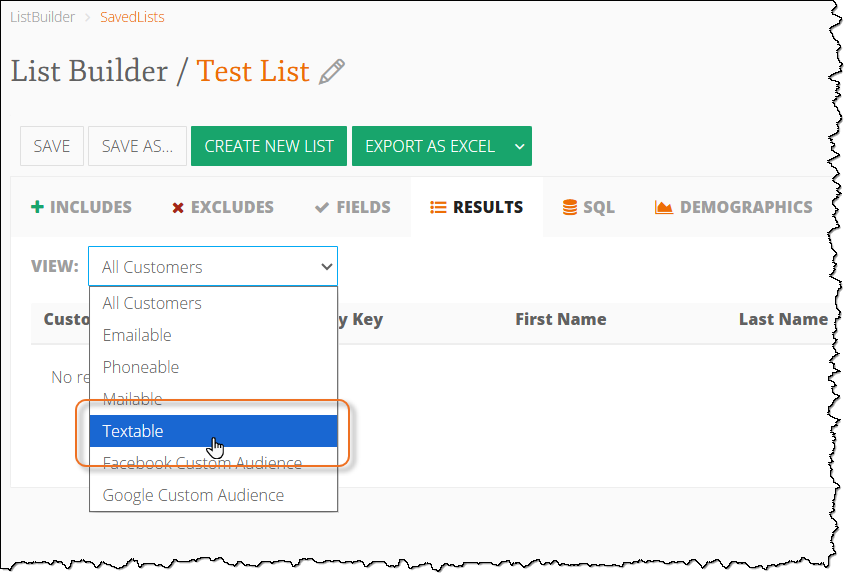
- From the View drop-down list, select Textable.
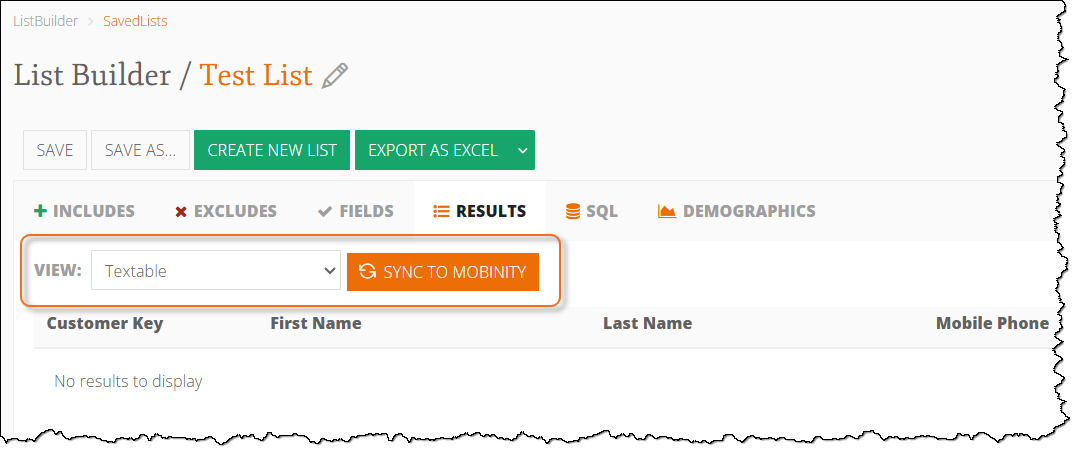
The Sync to Mobiniti button appears.
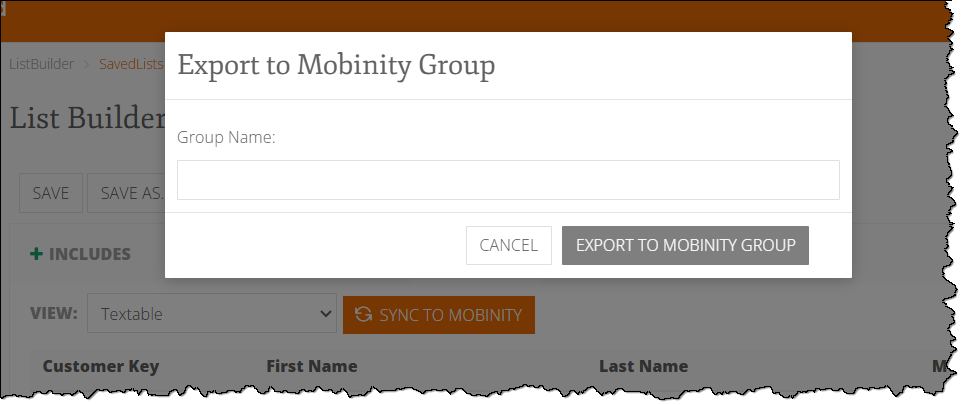
- Click Sync to Mobiniti. The Export to Mobiniti Group window appears.
- In the Group Name field, enter the name of the Mobiniti group to which you want to export the list and click Export to Mobinity Group.
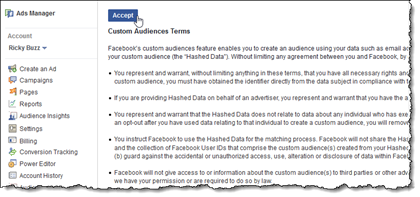
Exporting a list directly to Facebook lets you create a Facebook Custom Audience that can be used in a Facebook Ad Campaign. To export a list directly to Facebook, you must have a Facebook Ad account. When exporting a list directly to Facebook for the first time, or if the Facebook Custom Audience Terms of Service have been updated since your last export, you must accept Facebook’s Custom Audience Terms of Service.
- Open the list you want to export to Facebook and click the Results tab.
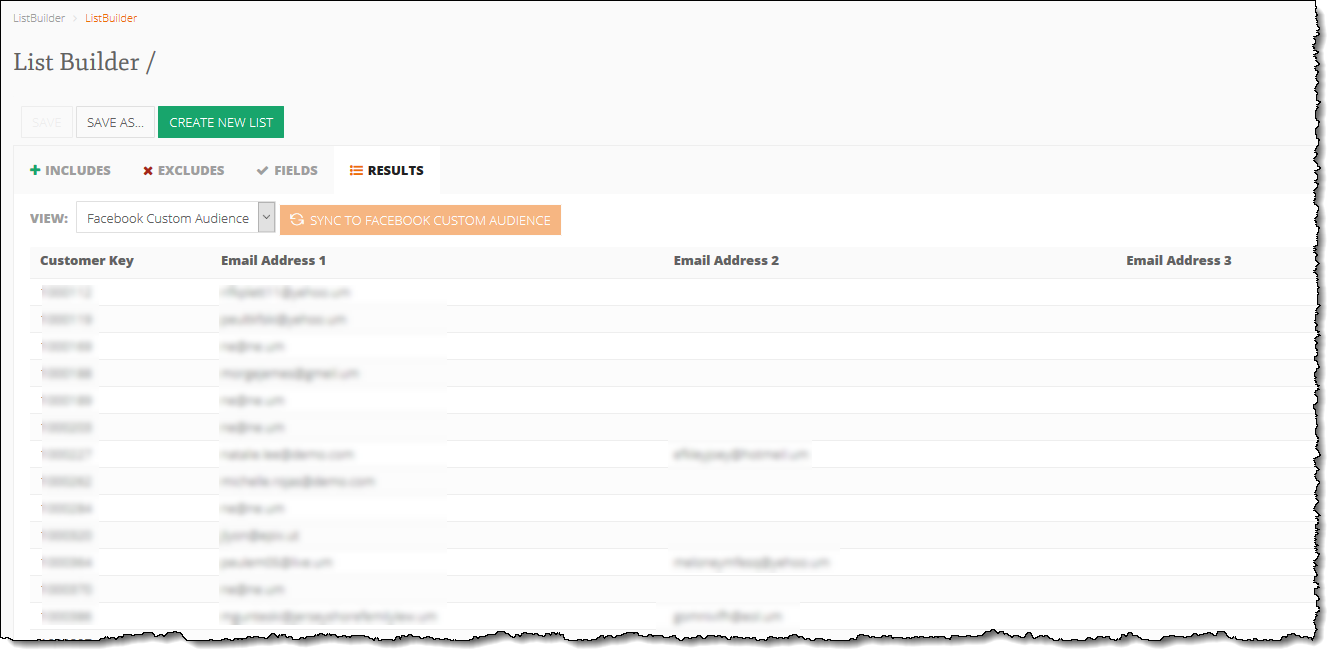
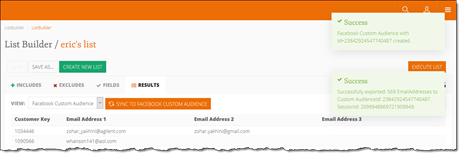
- From the View drop-down list, select Facebook Custom Audience. The Sync to Facebook Custom Audience button appears and the list output changes to Customer Key and Email Address.
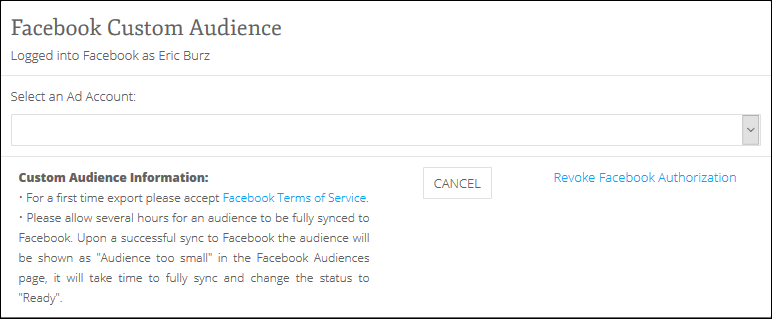
- Click Sync to Custom Facebook Audience. The Facebook Custom Audience screen appears.
Note: If this is your first time exporting a list directly to Facebook, this screen will display a link to log in to Facebook.
- If this is your first time exporting a list directly to Facebook, log in to Facebook through Marketing Cloud:
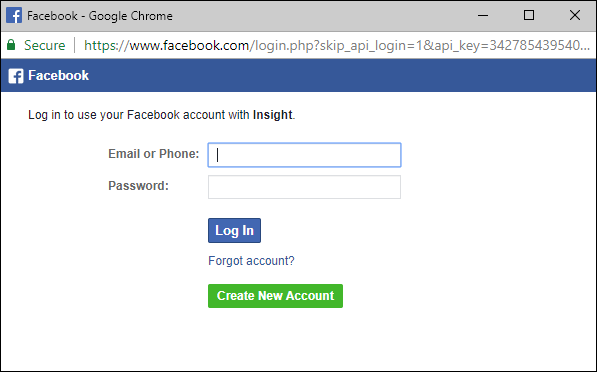
- Click Log in to Facebook. A new window appears requesting your Facebook login credentials.
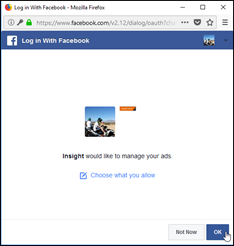
- In the blank fields, enter your Facebook login credentials and click Log In. Your profile picture appears with a prompt to allow Marketing Cloud to manage your ads.
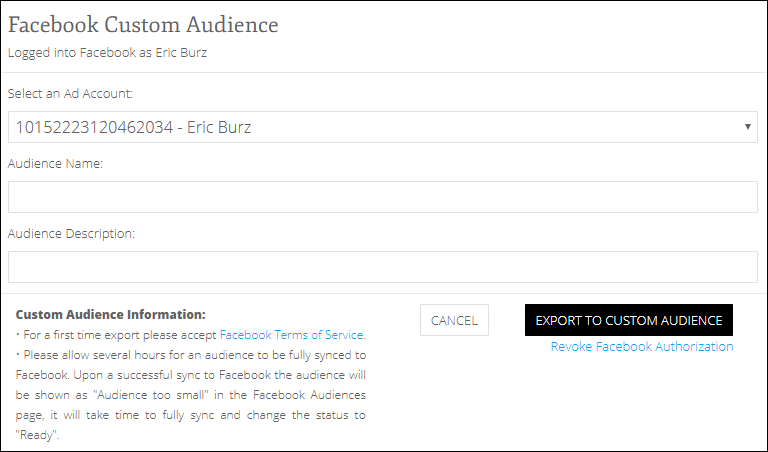
- Click OK. The Facebook Custom Audience window reappears with a new drop-down list.
- From the Select an Ad Account drop-down list, select the ad account to which you want to export your list. The Audience Name and Audience Description fields appear.
- In the Audience Name field, enter a name for your audience.
- Optionally, in the Audience Description field, enter a description for your audience.
- If this is your first time exporting a list directly to Facebook, accept Facebook’s Custom Audience Terms of Service:
- From the Facebook Custom Audience window in Marketing Cloud, click Export to Custom Audience. A message appears either stating that your list was successfully exported or that you need to accept Facebook’s Custom Audience Terms of Service:
- If you have previously exported a list directly to Facebook and receive a message to accept Facebook’s Custom Audience Terms of Service:
- Log in to your Facebook Ad account.
- In the Facebook Search field, enter “audiences.” Click the search icon. The Audiences window appears.
- In the Availability column of your newly exported list, click Accept TOS. The availability status changes to Ready, and your list is now available to use in Facebook Ad Campaigns.
Note: If the Availability column for your list displays Audience Too Small, it may take a few hours for the status to change to Ready.
- In the Search field of your Facebook Ad account, enter “audiences” and click the search icon. The Audiences screen appears.
Your exported list is displayed in the Custom Audiences table and is now available to use in Facebook Ad Campaigns.
Note: If the Availability column for your list displays Audience Too Small, it may take a few hours for the status to change to Ready.
Exporting a list directly to Google™ lets you create a Google audience that can be used in a Google Ads™ campaign. To export a list directly to Google, you must have a Google Ads account that is "whitelisted," or in good standing, with Google Ads. For more information about ensuring your Google Ads account is whitelisted, click here.
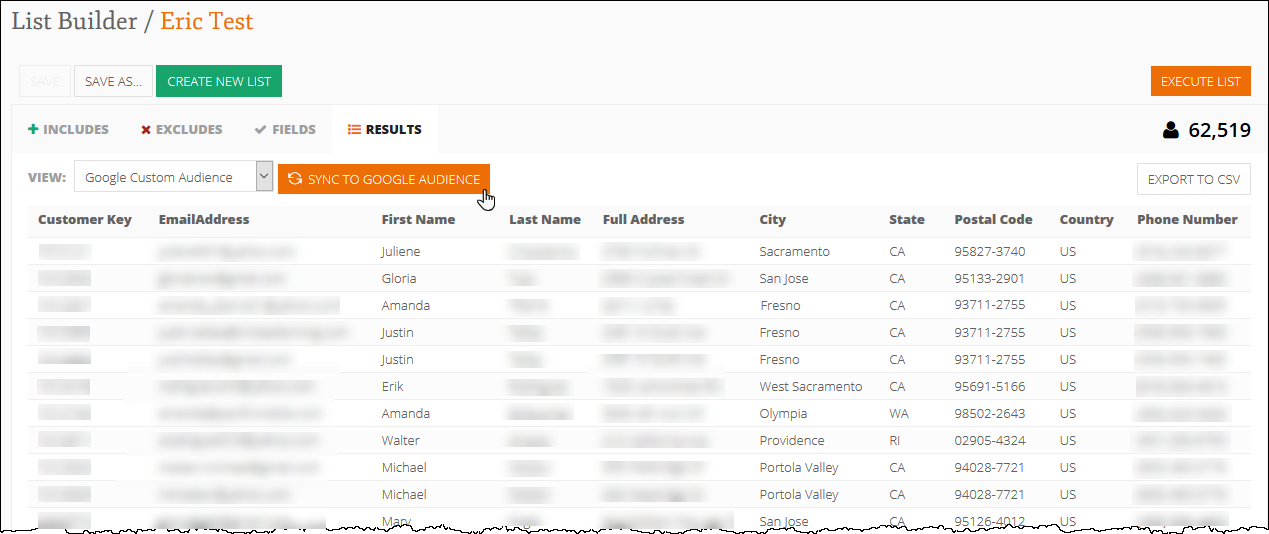
Google Ads expects specific fields to be present on new list uploads and Marketing Cloud automatically changes your list output to the required fields before being exported.
- Open the list you want to export to Google and click the Results tab.
Note: If no results are present, click the Execute List button.
- From the View drop-down list, select Google Custom Audience. The Sync to Google Audience button appears and the list output changes to the fields expected by Google Ads.
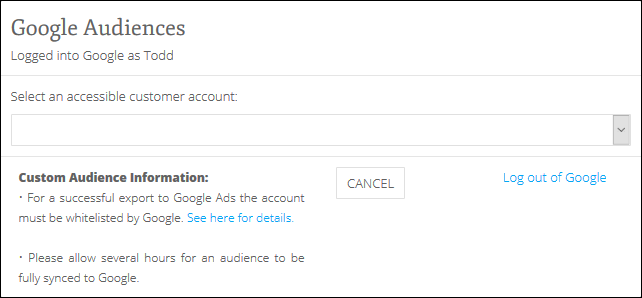
- Click Sync to Google Audience. The Google Audiences screen appears.
- If this is your first time exporting a list directly to Google, log in to Google through Marketing Cloud:
- Click Log in to Google. A new window appears requesting the email address or phone number associated with your Google account.
- In the blank field, enter the email address or phone number associated with your Google account and click Next. A new field appears requesting your account password.
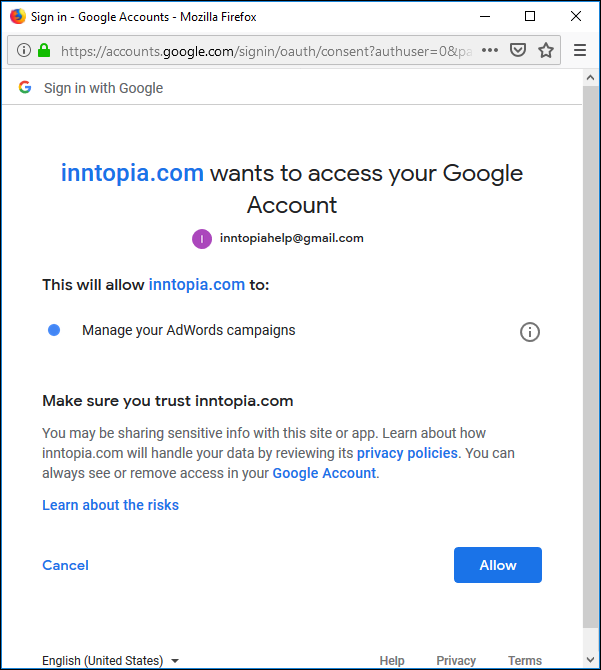
- Enter your account password and click Next. A message from Inntopia appears requesting access to your Google account.
- Click Allow. Access to your Google account is now allowed through Marketing Cloud. The Google Audiences screen reappears with a new field.
Note: Upon completing this step, you will receive an email from Google confirming that account access has been granted to Marketing Cloud. This email is for security purposes only and no action is required on your part.
- If you have previously exported a list directly to Google, select a Google account and associated Google Ads account:
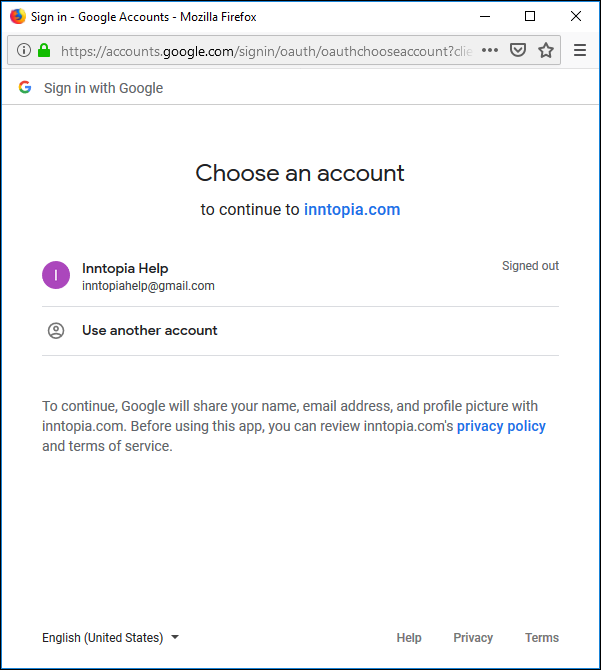
- Click Log in to Google. A new window appears requesting that you choose a Google account.
- To select an account that was previously used, click on the account name. A message from Inntopia appears requesting access to your Google account.
- Click Allow. Access to your Google account is now allowed through Marketing Cloud. The Google Audiences screen reappears with a new field.
Note: Upon completing this step, you will receive an email from Google confirming that account access has been granted to Marketing Cloud. This email is for security purposes only and no action is required on your part.
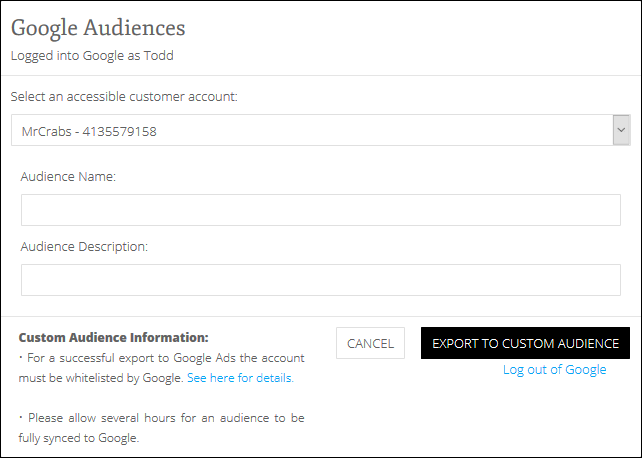
- From the Select an accessible customer account drop-down list, select a Google Ads account. Two new fields appear.
- In the Audience Name field, enter a name for your audience.
- Optionally, in the Audience Description field, enter a description for your audience.
- Click Export to Custom Audience. When the export is complete, a message appears stating that your list was successfully exported to Google Ads.
- From your web browser, log in to your Google Ads account. On the top toolbar in your Google Ads account, click Tools. From the drop-down list that appears, under Shared Library, click Audience manager. The Audience manager screen appears with the Remarketing tab selected.
- Your exported list is displayed in the table of audience names. The Membership status column next to your list indicates whether it is still being uploaded ("Open") or has finished being uploaded ("Closed"). It may take up to 24 hours for your list to have a Membership status of "Closed" and be available for use in Google Ads campaigns.
Google and the Google logo are registered trademarks of Google LLC, used with permission.



 Google Audiences Screen.png)
