Manage Promotion Invitations
If the Discount Set By field in the Settings screen for a promotion is set to Supplier, resellers can invite suppliers to participate in the promotion and set their own discount amounts. Suppliers can either accept or decline a promotion invitation.
When you invite a supplier to participate in a promotion, the supplier receives an email and sees an invitation notice in the New Promo Invitations tab in their Inntopia RMS that indicates an invitation to participate in a promotion created by the CRS/Reseller. The supplier can review the promotion information and either accept or decline the invitation to participate.
- In the Settings window of the promotion, set the Discount is Set By field to Supplier.
- From the list of promotions, click the promotion name. The components for the promotion appear.
- In the Options drop-down list of the component for which you want to invite suppliers to participate, click the supplier name.
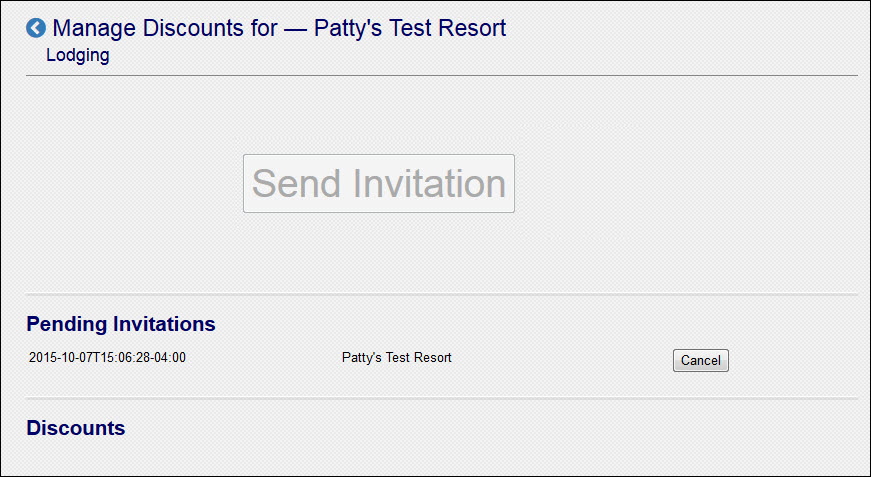
- Click Send Invitation. The Send Invitation button is greyed out and the invitation is listed in the Pending Invitations section. An email is sent to the supplier alerting them to the invitation.
- If the supplier accepts the invitation to participate in the promotion, they must configure a discount for each product they want to include in the promotion. The supplier can configure discounts immediately upon accepting the invitation or can wait until a later time and set the discount in the Promotions tab of their RMS account.
- Upon the supplier accepting the invitation to participate and entering the discount information, the supplier’s products and corresponding discount are listed on the Manage Discounts for <supplier> screen for that for that promotion.
- If the supplier accidentally declines the package invitation, or declines and decides later to participate, you must resend an invitation to the supplier for acceptance.
Note: The supplier’s discount appears in the discount list of the Manage Discounts for <supplier name> screen even if they chose No Discount when accepting the invite and setting the discount.
- If a supplier has not yet accepted an invitation and you no longer want to extend it, cancel the invitation by clicking the invitation’s corresponding Cancel button on the Manage Discounts for <supplier name> page. The invitation notice is removed from the supplier’s New Promo Invitations tab.
- To remove a supplier’s discount from a package component, on the Manage Discount’s page for <supplier name>, click the Remove button corresponding to that supplier’s discount.
Note: When a component supplier is invited to participate in a promotion, and the invitation is accepted by the supplier, the promotion is automatically listed in the supplier’s Promotions page with an icon indicating it as an invited promotion. However, when the supplier clicks on the promotion, they can only access their own products. They cannot see or set discounts for products included in components from other suppliers.
The Manage Discounts for <supplier name> page appears with a Send Invitation button. Any invitations that have been sent and are currently pending are listed.
The invitation also appears in the New Promo Invitations tab of the invited supplier’s Inntopia RMS home page where the supplier can either accept or decline the invitation.
In the promotion's Options drop-down menu, suppliers appear listed with a + sign icon. Suppliers who have accepted an invitation to participate are listed with a pencil icon.
Note: If the supplier wants to include non-discounted products in the promotion, they must configure those products with a Discount Type of No Discount.
If you receive an invitation to participate in a promotion from a reseller and want to participate, you MUST set a discount for each product you want to include in the promotion. To include a non-discounted product in the promotion, you must set its Discount Type to No Discount.
You can configure different discounts for each product you want to include in the promotion.
- From your Inntopia RMS home page, click the New Promo Invitations tab. The list of pending promotion invitations appears.
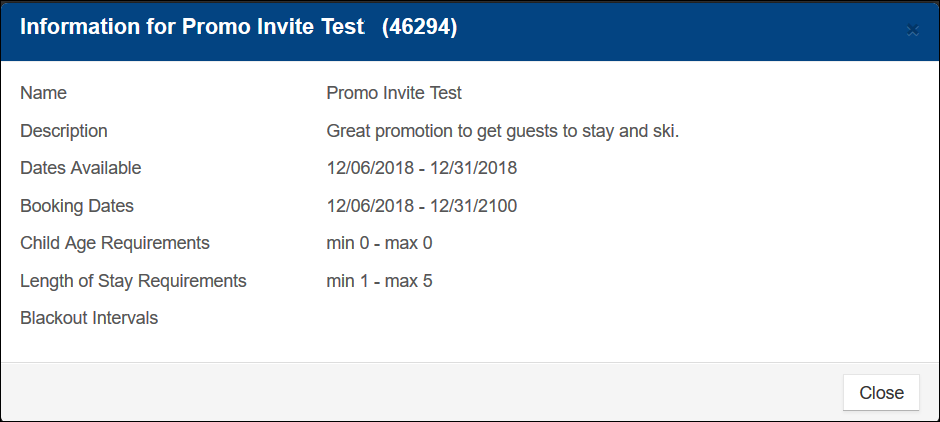
- To view the promotion details prior to accepting or declining the invitation, click the promotion name. The Information for <promotion name> pop-up window appears showing the details of the promotion. When you have finished viewing the details, click Close.
- To decline the invitation, click the invitation’s corresponding Decline button. The invitation disappears from the list of pending invitations.
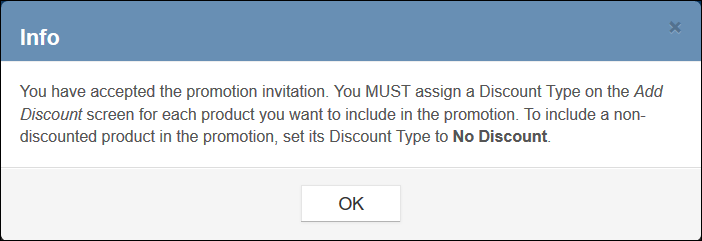
- To participate in the promotion and add a discount for your products, click the invitation’s corresponding Accept button. A pop-up message appears indicating that you accepted the invitation and prompting you to configure discounts for each product you want to include in the promotion.
- After reading the message, click OK. The Manage Discounts screen for <supplier> appears.
- To configure discounts now, click Add Discount. The Add Discount for <supplier name – promotion name> screen appears.
Note: If you choose to accept the invitation but want to enter the discount information at a later time, you must access the Manage Discount window for the promotion directly through the Promotions tab.
- Select the product(s) you want to include in the promotion.
- In the Discount Type drop-down list, select the type of discount you want to apply to the product(s) for the promotion.
For detailed explanations of Discount Types, click here.
- Click Add. The product(s) and corresponding discount(s) are listed on the Manage Discounts for <supplier> screen in the reseller’s Inntopia RMS account for that promotion.
- To add more products and their discounts to the promotion, click Add Discount.
- To add products to a listed discount, click its corresponding blue Add Products icon.
- To make changes to a listed discount, click its corresponding Edit button and make changes on the Edit Discount window.
- To remove a product from a discount, click its corresponding Remove Product icon.
- To remove a discount and all its associated products, click its corresponding Delete button and in the Are you sure? pop-up box, click Yes.
- To enter Date Overrides for a product or discount, click either Set Bulk Date Overrides (discount) or Set Date Overrides (product).
- To set Tiered Rate Overrides for a discount, click the corresponding Add Tiered Rate Override icon.
- When you are finished adding products and discounts, click Close.
Note: To include a non-discounted product in the promotion, set its Discount Type to No Discount. If you do not set a Discount Type for a product, it will not appear in search results for the promotion.
If you had previously accepted a promotion but no longer want to participate, you can stop participating by removing your products and discounts from the promotion. Once you have removed your products and associated discounts, the promotion no longer appears in the list of promotions on your Promotions page.
- From your RMS Home page, click the Promotions tab. The Promotions screen appears.
- In the list of promotions, find and click on the name of the promotion in which you want to stop participating. The component(s) associated with the promotion appear.
- Click the component's corresponding Edit Options button (pencil icon). The Manage Discounts for <supplier> screen appears.
- Delete each discount associated with the promotion and click Close. The promotion is removed from the Promotions screen.


