Promotion Inspector
Use the Promotion Inspector to quickly view details about a promotion (including components, available dates, black-out dates, etc.), navigate its configuration, view which suppliers have been added to a promotion or which products have been added to a component, and troubleshoot issues with greater efficiency.
- Log into your Inntopia CRS account.
If you have one sales channel, the Commerce Portal appears.
If you have multiple sales channels, on the Select a Sales Channel screen, click the name of the sales channel you want to work with. The Commerce Portal appears.
-
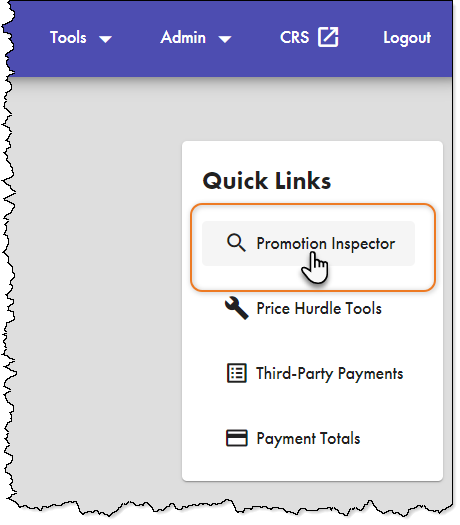
From either the Quick Links menu or the Tools drop-down list, click Promotion Inspector.
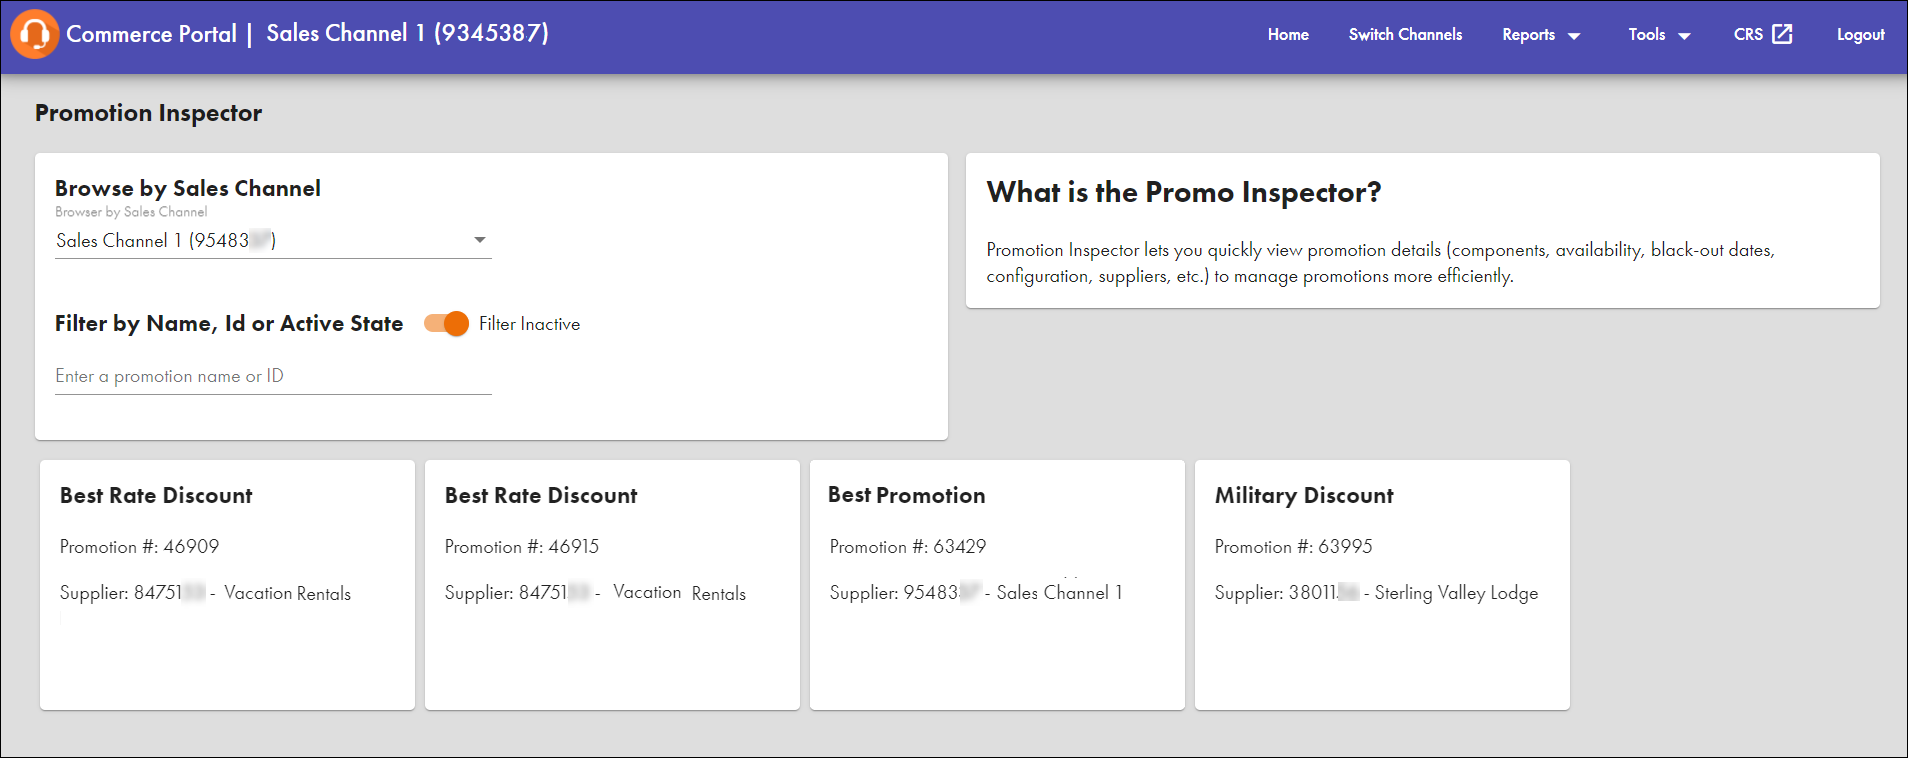
The Promotion Inspector search screen appears showing any promotions in place for your sales channel.
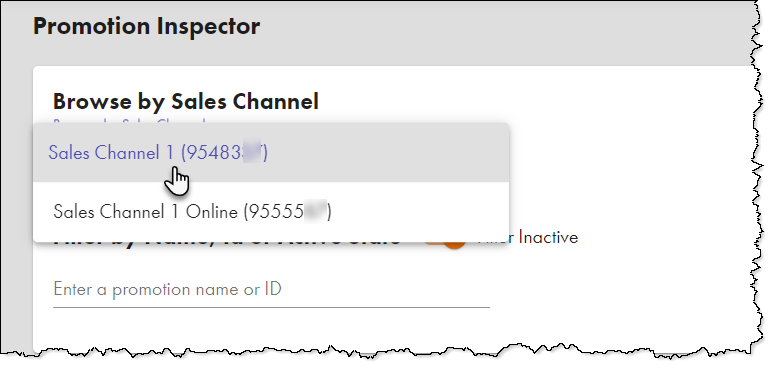
- To change the sales channel you are working with, in the Browse by Sales Channel drop-down list, select a sales channel.
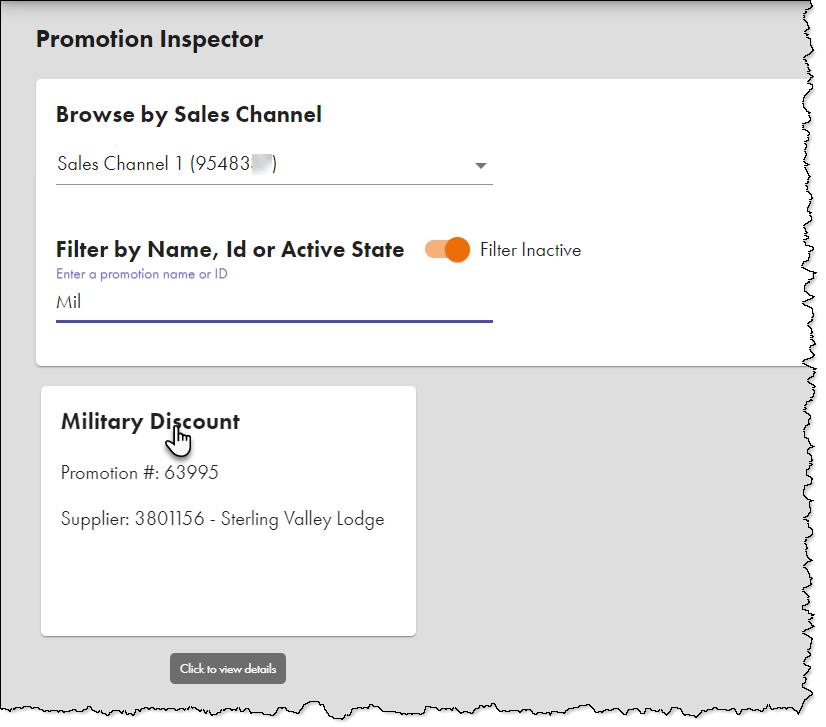
- To search for a specific promotion, in the Enter a promotion name or ID search field, enter either a full or partial promotion name or full promotion ID and click the Search icon.
To include inactive promotions in search results, toggle the Filter Inactive switch.
The promotions most closely matching your search criteria appear.
- Click on the promotion with which you want to work.
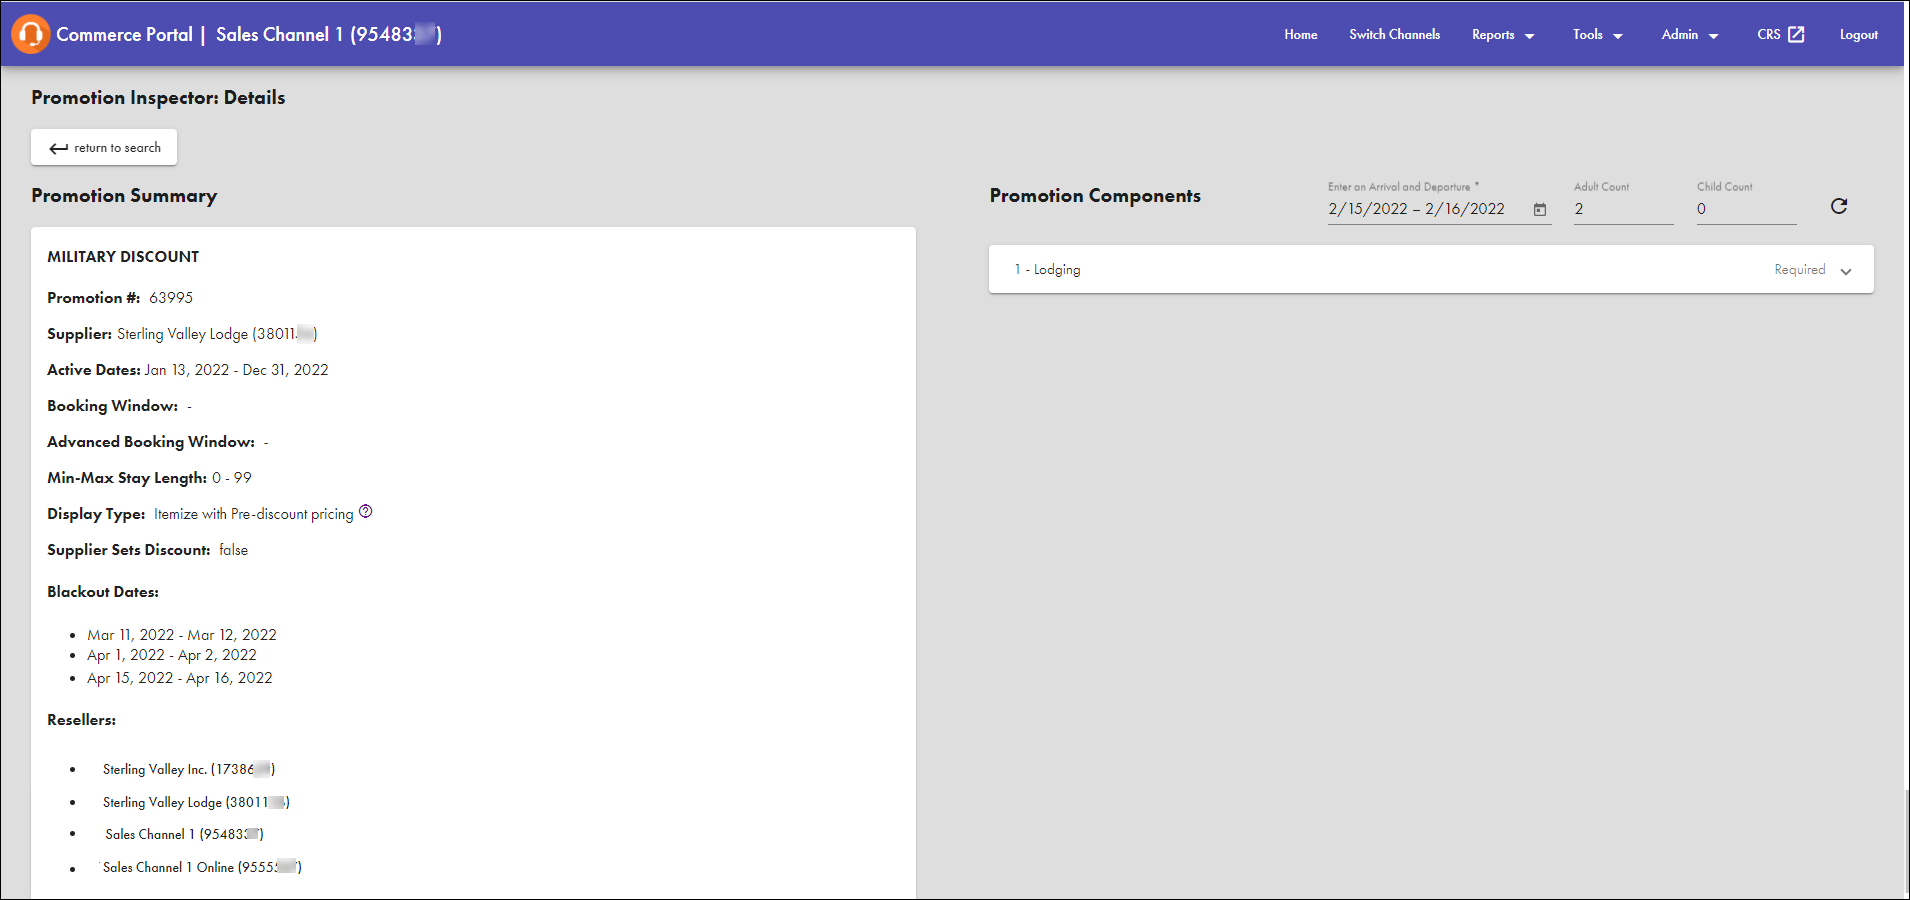
The Promotion Inspector: Details screen appears showing a Promotion Summary and Promotion Components section.
- To return to the search results, click Return to Search.
Note: Using your browser's Back button does not retain search results.
The Promotion Summary section shows details of the promotion's setup.
- Promotion # – Promotion ID number.
- Supplier – Name of the supplier associated with the promotion.
- Promotion Code – A unique numeric, alpha, or alpha-numeric code for the promotion.
- Active Dates – Dates for which the promotion is set to be active.
- Booking Window – Dates during which the promotion can be booked.
- Advanced Booking Window – Indicates a specific number of days in advance of the arrival date that a guest can book the promotion. Promotions with advance booking requirements are presented in search results to the call-center agent and online consumer only when the min and/or max requirements are met in search criteria.
- Min-Max Stay Length – Length of Stay requirements. Default is 0 – 99.
- Display Type – Shows how the discounts for a promotion with multiple components are displayed to consumers.
- Supplier Sets Discount – Shows whether the supplier has control over setting the discounts.
- Blackout Dates (if applicable) – Lists black-out dates if any apply to the promotion.
- Resellers – Shows which sales channels (resellers) are set up to sell the promotion.
The Promotion Components section shows information about each component that has been added to the promotion. The components are listed in the order in which they were configured.
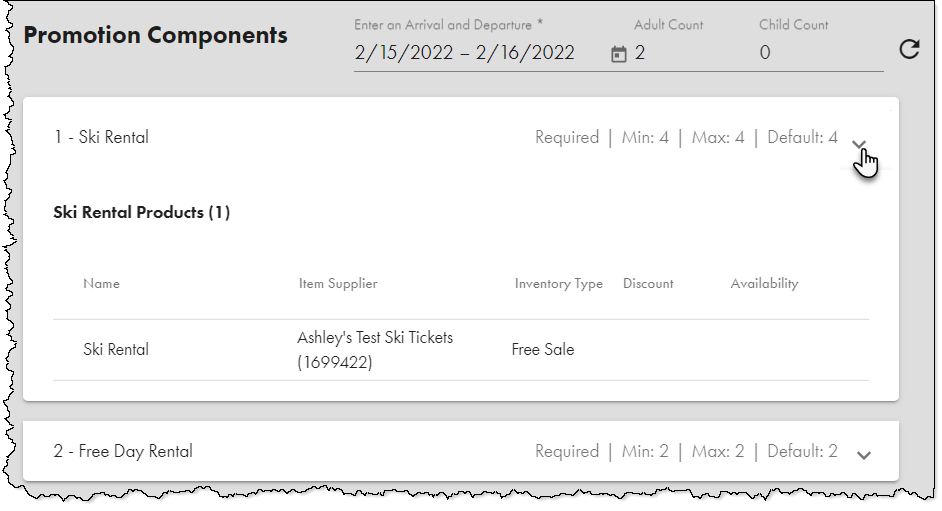
The basic, at-a-glance information shows whether a component is required, and the minimum, maximum, and default quantities.
- Default quantity – The basic, or suggested, amount of a promotion component that you want to be purchased as part of the promotion. This amount appears in the Qty drop-down list in search results; however, the customer or agent can select an alternate amount from the Qty drop-down list. If you do not set a default quantity, the system defaults to one.
- Minimum quantity – The amount of a promotion component that must be purchased as part of a promotion. When you set a minimum quantity, the Qty drop-down list begins at this number; therefore, the customer cannot purchase a lesser amount of this product.
- Maximum quantity – The amount of a promotion component that can be purchased as part of a promotion. When you set a maximum quantity, the Qty drop-down list ends with this number; therefore, the customer cannot purchase a greater amount of this product. If you do not enter a maximum amount for a component, the system defaults to 50 meaning the online customer can choose up to 50 of that component.
Note: Promotion components set up with RTP and/or Siriusware interfaced products that require itemized guest information such as DOB, height, weight, shoe size, etc. should have min/max/default quantities of ‘1’ so that these items appear as separate line items on the itinerary.
To assist with troubleshooting issues, you can view component setup information that is specific to the same date range an end user has searched.
-
To view the promotion for the same dates searched by the guest or partner, in the fields at the top of the Promotion Components section, enter the Arrival Date, Departure Date, Adult Count, and Child Count. The default arrival date is today's date and the default departure date is tomorrow's date.
- Click the Refresh icon. The promotion details appear showing the settings in place for the promotion during the dates you entered.
-
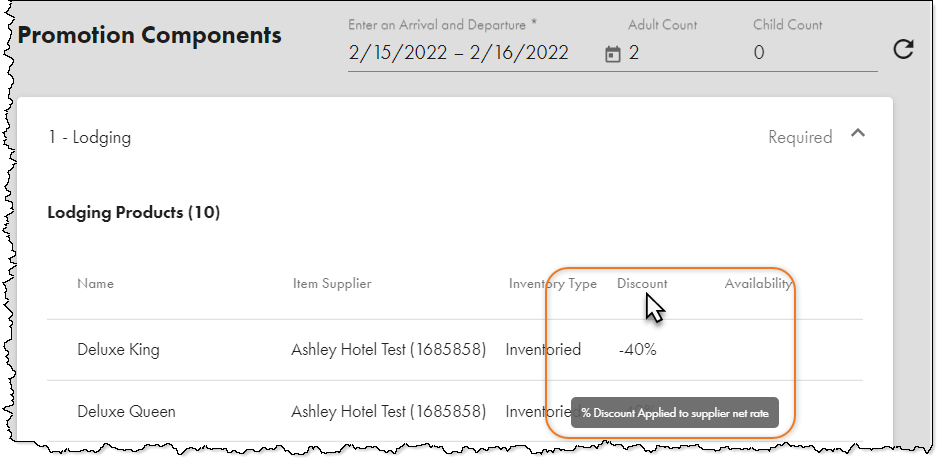
To view additional details about the Min, Max, and Default quantities of a component, hover your mouse pointer over the corresponding field.
- To view additional details about a component, find the component you want to work with and click its corresponding down arrow.
The component details appear including the number of products added to the component.
 Show Me Column Descriptions
- Name – Name of the product associated with the component.
- Item Supplier – Name and Supplier ID of the supplier providing the component product.
- Inventory Type – Type of rate/availability to which the component product is assigned. View Inventory Types.
- Discount – Discount associated with the component product.
- Availability – Shows the number available and the price of the component product. If the product has zero availability, the words No Availability appear in red.
-
To see more detailed information about a product name or discount setting, hover your mouse pointer over a specific value in the corresponding column.

