Set Product Search Attributes
The Inntopia system provides attributes you can use to describe your lodging and non-lodging products to help call-center agents and online consumers filter searches. This topic explains how to set these attributes for your property and products from Inntopia RMS.
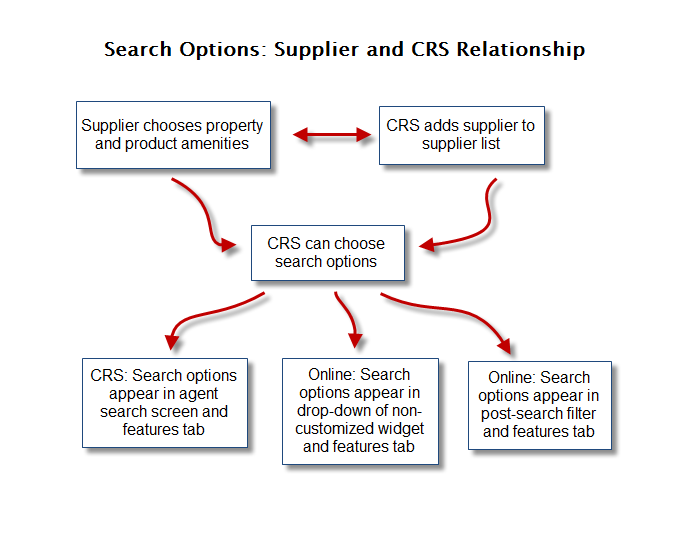
The flow chart below demonstrates the important relationship between CRS and Suppliers for setting up search options.
You can use Inntopia RMS to distribute information about your supplier and products to a local call center, your own website, or both through Inntopia CRS and/or Inntopia eComm. Call-center agents and online consumers use some of these attributes to filter their searches making it easier to find what they are looking for.
Taking the time to set up these attributes for each property and product will increase the number of instances they are included in search results, which means more bookings for you.
To be included in as many search results as possible, set up as many attributes as apply to your property and products. When working with a call center, it is important to know which basic attributes their agents use in their searches. You can provide as many specific attributes as you want for searches; however, for your property and products to be included in call-center search results, you must set up at least those basic attributes in RMS.
Many items in the lists of property attributes are similar, such as Heated Pool, Indoor Pool, Pool, or Pool (Year-round) so it is important to select the correct attributes.
For example, if a call center agent performs a search of Property Amenities by Pool and you selected only Heated Pool when setting up Property Amenities, your property would not be included in those search results. However, if you selected Heated Pool and Pool, your property would be included in those search results.
Note: If a product has a location associated with it, Inntopia looks at the Property Amenities of the Location during a search. If a CRS wants to search by amenity, you must set property amenities for locations.
Property amenities and property attributes describe your lodging property to call-center agents and online consumers. The amenities and attributes you can choose from to describe your property are from comprehensive pre-defined lists maintained by Inntopia. Each amenity and attribute you select from these lists is included in the list of search options the call-center manager can choose from to narrow, or filter, searches for both agents and online consumers.
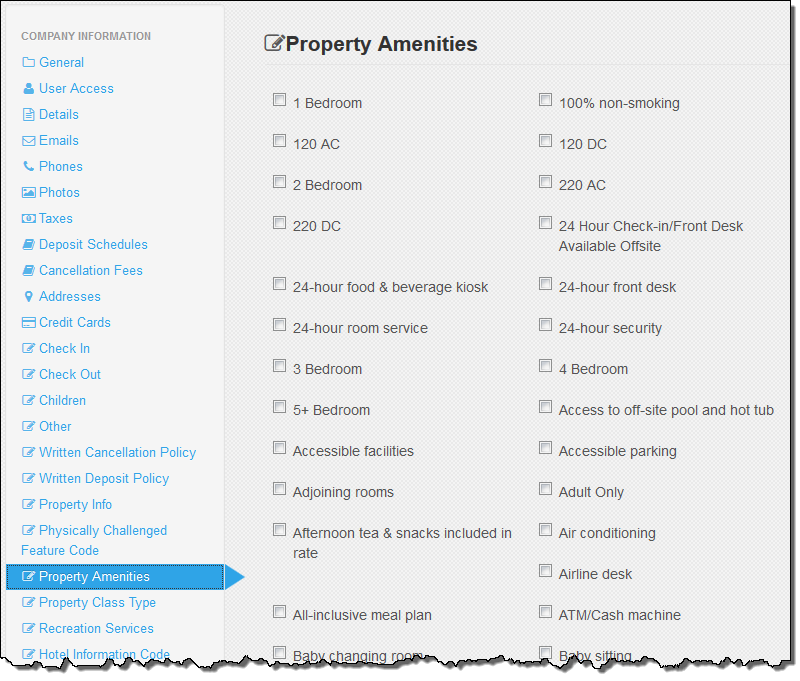
- Property amenities apply to the entire lodging property. For example, if you offer Free WiFI or Free Parking throughout your property, you would select those as property amenities. You can select the property amenities for your lodging properties on the Company Information screen in your Inntopia RMS supplier account.
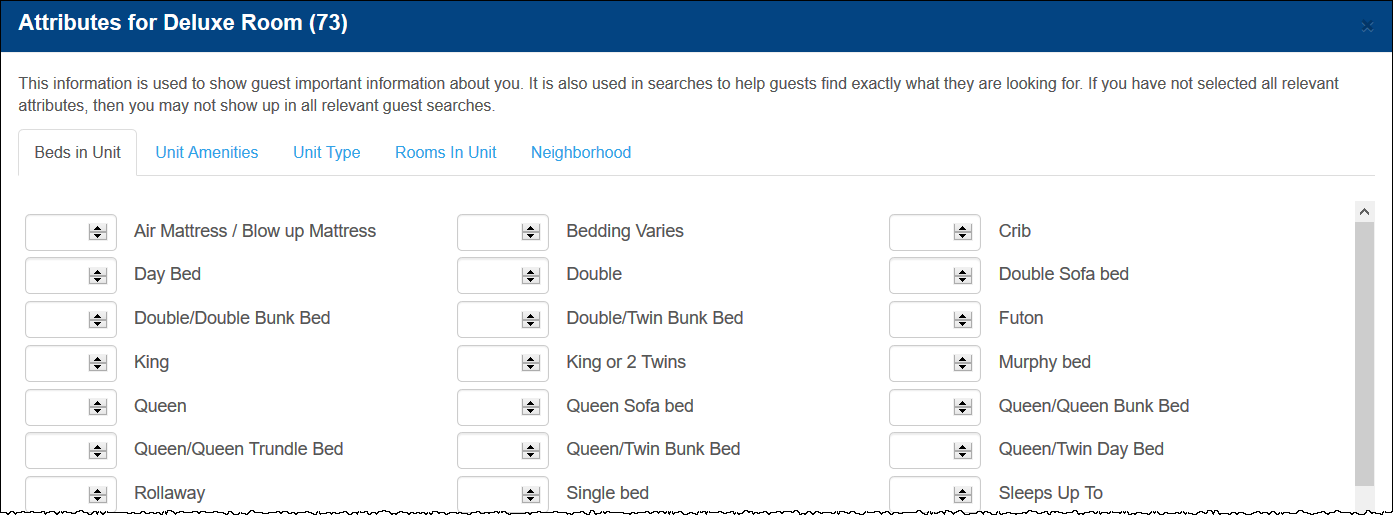
- Property attributes apply to specific units within your property. For example, if your property has condos with various numbers of bedrooms and bathrooms, you would select those as Rooms in Unit. You can set the search options for your lodging product attributes in the Attributes pop-up window for each product.
The Inntopia system includes a great number of non-lodging product search attributes that are associated with various product categories. These associations are determined by Inntopia and vary by product category; therefore, the attributes you see in the Attributes window will vary depending on the product.
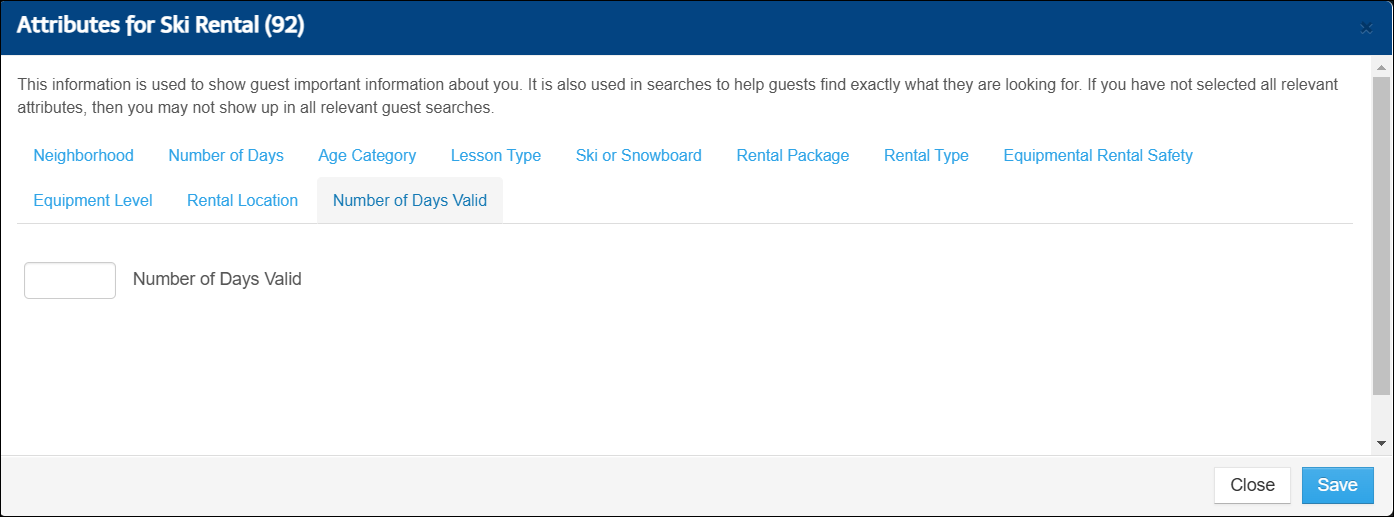
You can set the search options for product attributes in the Attributes pop-up window for each product. As you set up your non-lodging products in Inntopia RMS, you can ensure those products are searchable by specific attributes by setting search options such as the age of the product user or by the number of days a product can be used.
- From the Inntopia RMS home page for your property, click the Company tab. The Company Information screen appears.
- On the left side of the page click Property Amenities. The Property Amenities window appears showing the list of property amenities.
- Scroll down the list and check the box to the left of each amenity that applies to your property. It is important to choose as many amenities as apply to your property to ensure it is included in as many search results as possible. If you work with a call center, be sure to choose at least the exact amenities they will use in their searches. If you do not choose these exact amenities, it will limit the number of instances your property is included in their search results, which means fewer bookings.
For call-center agents and online consumers, the amenities you selected appear in the Features window of the Location Details screen.
- From the Inntopia RMS home page for your property, click the Products tab. The Products page appears with your available lodging and non-lodging products listed.
- Find the product you want to work with and from its corresponding Settings menu, click Attributes. The Attributes screen for that product appears. The screen that appears will differ depending on whether you choose a lodging or non-lodging product.
 Show Me Property Attributes
- Beds in Unit – Type and number of bed(s) contained in a specific unit such as Queen, Double, Bunk, Sofabed, Crib, etc.
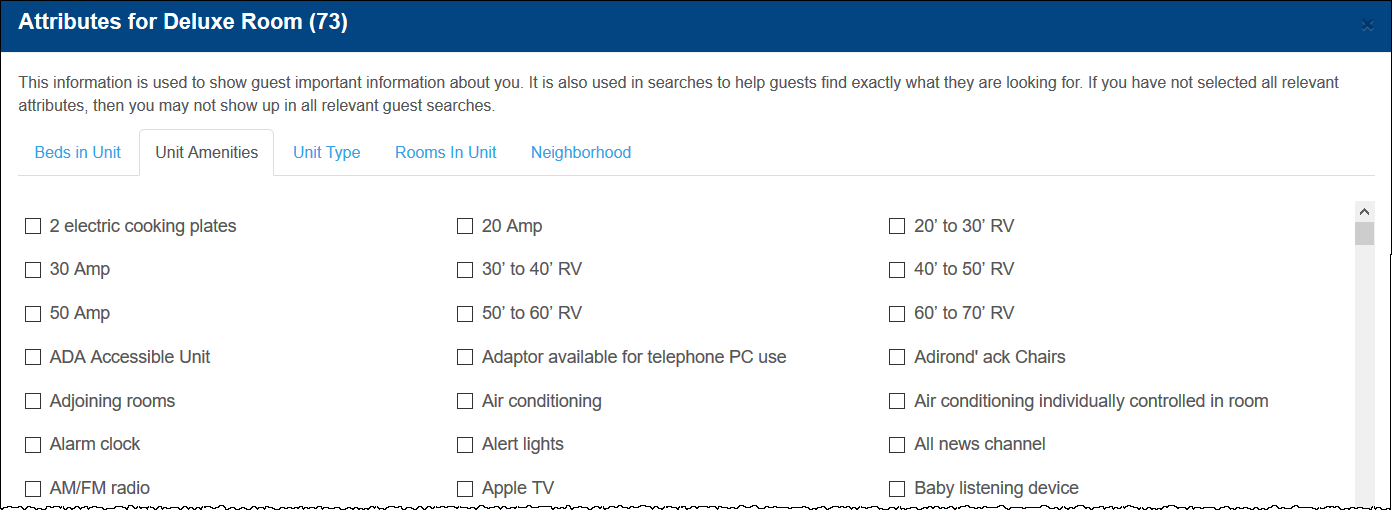
- Unit Amenities – Specific features available in a particular product (or room) such as air conditioning, ironing board, or hair dryer.
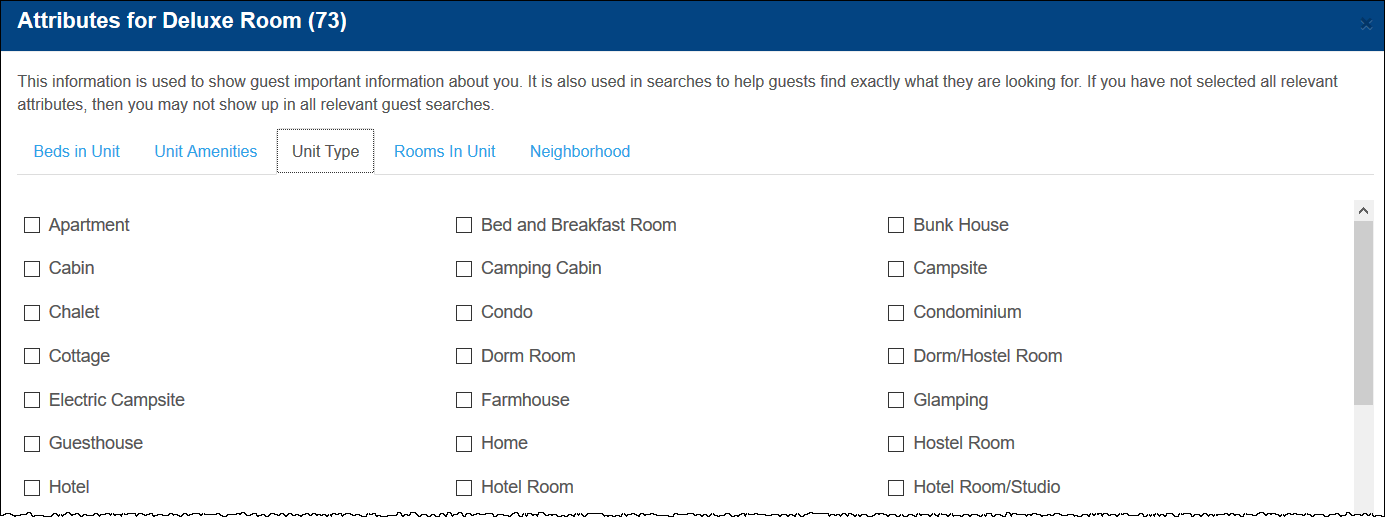
- Unit Type – Describes the kind of lodging you are selling such as hotel room, condo, or campsite.
Rooms in Unit – Indicates the number and types of rooms available for a lodging product such as bedrooms or bathrooms.
Notes:- If the Bedrooms field is left blank, your property will show up in initial search results; however, if an agent or online guest filters for a specific number of bedrooms, your property will not show up in those subsequent results.
- To ensure a Studio unit shows up in search results filtered by a specific number of bedrooms, set the Bedrooms field to zero.
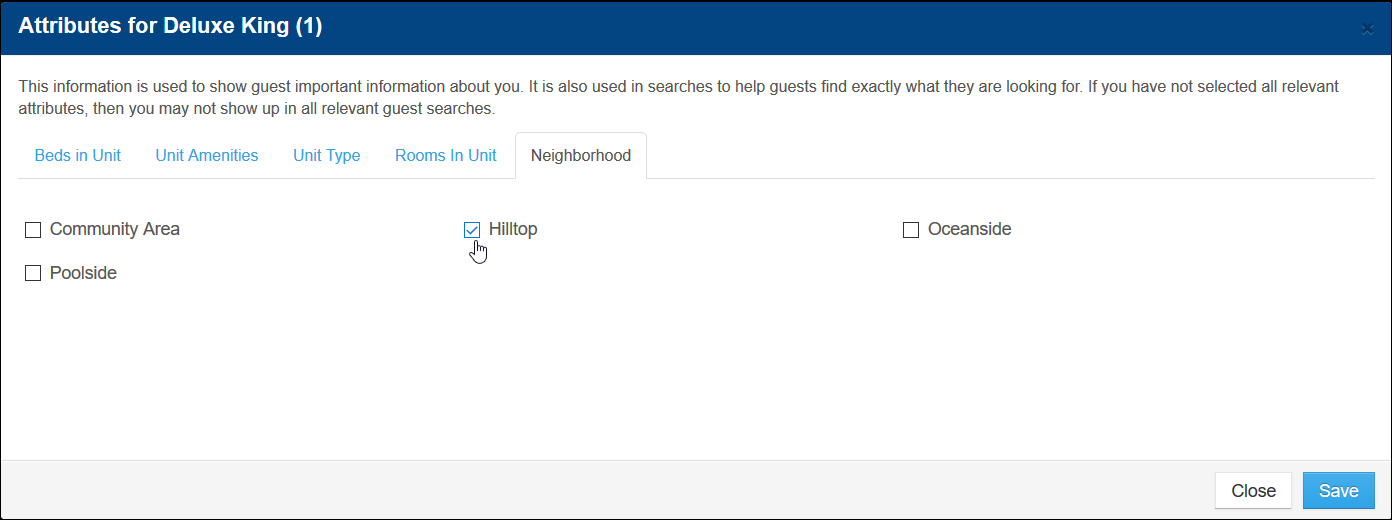
Neighborhoods (Lodging) – Neighborhoods are used to divide a city or town into different geographic sections in which one or more products might be located. Online consumers and call-center agents can filter a search by selecting the neighborhood that best suits their needs.
Neighborhoods that apply to your lodging products are added to the system by Inntopia. To ensure your products are included in as many search results as possible, Inntopia recommends selecting a neighborhood for each lodging product.
Unit Location (Lodging) – Special category for properties that have multiple management companies, or suppliers, managing different units at the same location. Unit Location can often be applied to units in condominium complexes.
When setting up attributes for products that are located somewhere other than your physical address, you can assign the appropriate location to each product. If you do not assign a product’s location in the Inntopia system, the product will not be listed in search results under that location name.
Before you can assign locations to products, all applicable locations must have already been entered into the Inntopia system. Locations are only available to choose from if the city, state, and country of a product’s Item Address matches the previously-entered city, state, and country of the location address.
 Show Me Product Attributes
Most search attributes are self-explanatory; however, some commonly used non-lodging search attributes needing further explanation are described below. For questions regarding search attributes not listed here, contact Inntopia Partner Services.
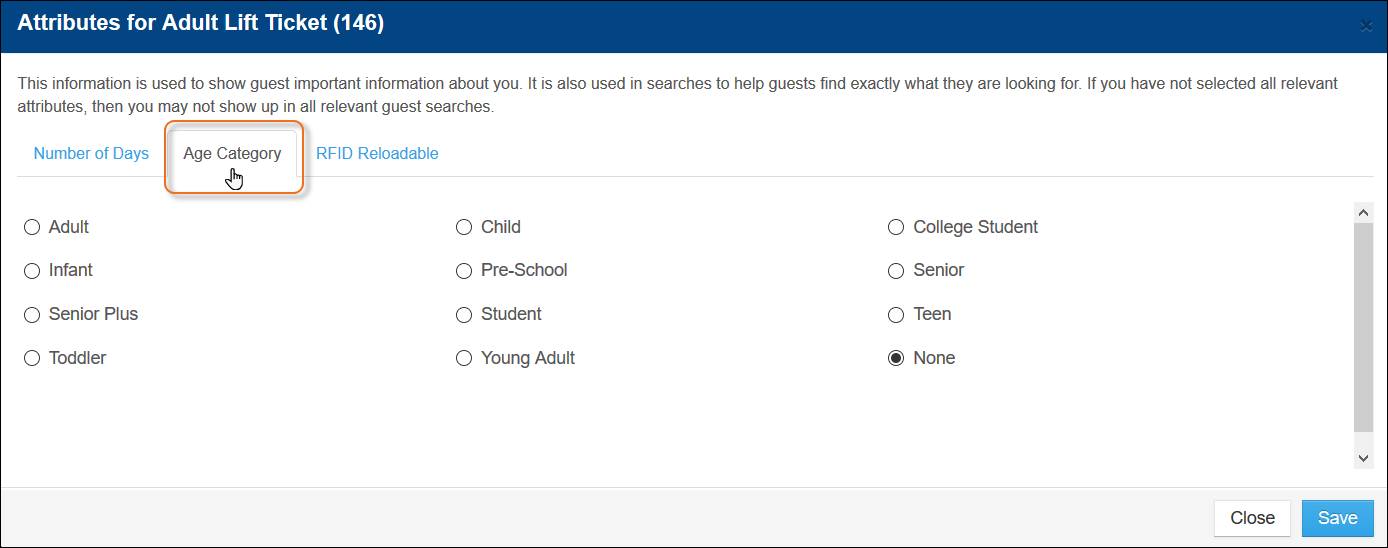
- Age Category – Age Categories are used for various non-lodging or activity products, such as lift tickets, to distinguish the ages of users to whom they are available. Only ONE Age Category can be assigned to a product at a time. Depending on how your system is set up, you can specify the Age Category to which the item belongs, such as Child, Adult, Young Adult, Senior and others.
Note: If your account has Age Validation enabled and you want to override the age ranges set up for an Age Category, click here.
- Number of Days – Number of days for which an activity product can be used, such as a three-day lift ticket.
Note: This setting differs from the Number of Days Valid which is used specifically for Sensible Weather-integrated products and specifies the how long an item is valid for use.
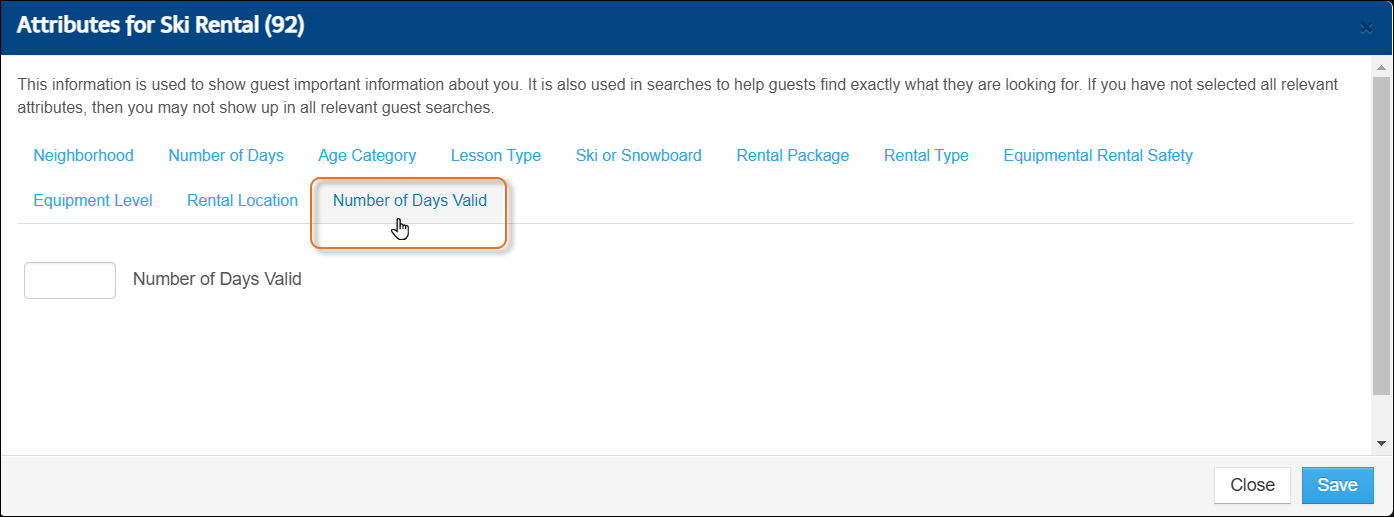
- Number of Days Valid – Used specifically for Sensible Weather-integrated products to specify the how long an item is valid for use.
For example, using the Number of Days attribute, you can set up a three-day lift ticket and then set the Number of Days Valid attribute for five days. The guest can use their ticket on three of five days and Sensible Weather knows the length of time for which to offer a weather guarantee.
- RFID Reloadable – Determines if a lift ticket can be loaded onto an existing RFID card. This is primarily intended for users who support RFID at their resort. Works in conjunction with the SiriusWare Two-Way Interface-Rate Lookups and Reservation Delivery to allow users to reload their cards automatically.
- Click the tab corresponding to the attribute you want to set. The list of available attribute options appears.
- Scroll through the list and select the attribute options that apply to your property or product.
- Click Save. The attribute options you selected appear for call-center agents and online consumers on the Features tab of the Item Details screen.
- To return to the Products page, click Close.
