Itinerary Notes
The Itinerary Notes feature provides agents with a means to enter itinerary-specific notes and to communicate with each other within an itinerary.
- Agents can email notes to another agent by selecting from an email list.
- Agents can create a note and flag it as an alert within an itinerary which is then accessible by any agent viewing the itinerary.
- Notes can be categorized by type.
- Agents can add notes to saved or reserved itineraries and quotes in Agentopia. (Product notes, and guest notes that are delivered in the guest email notifications, can be created in Inntopia CRS.)
- Itinerary notes are not seen by the guest.
- Agents can create quote notes that are emailed to the guest in quote emails.
Note: The Itinerary Notes feature is only available in the Agentopia version of CRS; however, itinerary notes that are designated with an "Alert" status can be viewed in the both the CRS legacy version of the Itinerary window and in Agentopia.
In the Itinerary Notes Categories section of the CRS System page, you can add, edit, and delete note types that will be available to agents when adding an itinerary note. You can also add a default email address for each itinerary note type, and when a note of that type is created, it is automatically sent to the default email address.
- From the CRS homepage, click the System tab.
- On the right side of the screen, scroll down to the Itinerary Notes Categories section.
- In the Note Type field, enter the type of note. For example, you might designate note types for Accounting and Reservations.
- In the Default Email field, enter the default email address that will automatically receive an itinerary note when one is submitted for the note type.
A group email address can be entered in the Default E-mail field. For example, for an Accounting note type, the email address accounting@inntopia.com may contain multiple recipients, and all of those recipients would receive notes designated with an Accounting note type.
If you don’t want to enter a default email address, leave this field blank.
- Click Add. The note type is added to the list.
- To modify a note type, enter new information and click its corresponding Save button.
- To remove a note type, click its corresponding X button. A message appears confirming that you want to delete the Note Type Category. To delete, click OK.
- From the CRS home page, click New Session.
- Leave the Open in Agentopia box checked and log a marketing source. To open the session in a new window, check the Open in new window box. Otherwise, leave this box unchecked.
- Create or retrieve an itinerary.
- At the bottom of the Itinerary window, click Itinerary Notes | History. The Itinerary Notes page appears. Any previously created itinerary notes are listed.
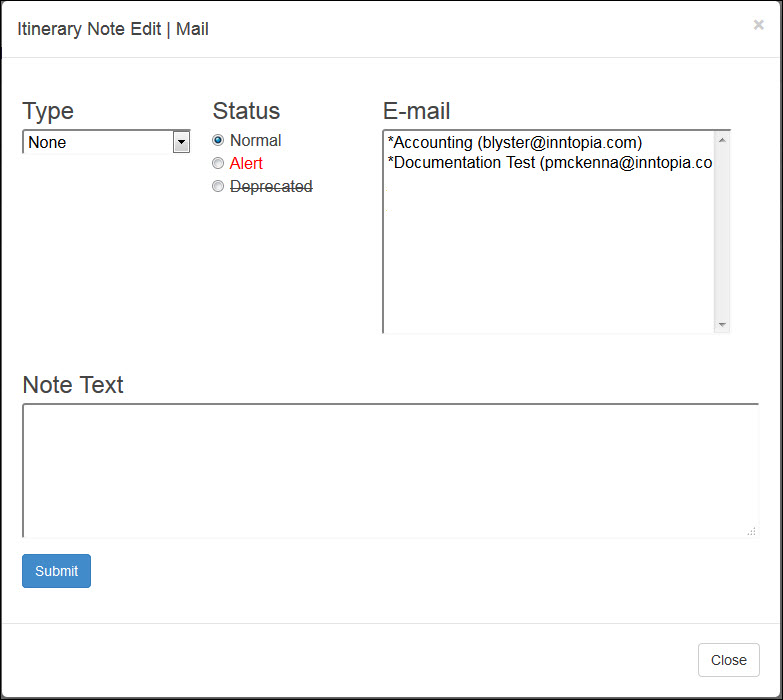
- Click Add Note. The Itinerary Note Edit/Email window appears with the email addresses of all users associated with the account listed in the E-mail box.
- From the Type drop-down list, select the note type. The default email for the note type you selected appears highlighted in the E-mail list.
- In addition to the default email address, you can choose to send the itinerary note in an email to as many email addresses as you want. To select more email addresses to receive the Itinerary Note email:
- PC: Hold down the Ctrl key and select the email addresses.
- Mac: Hold down the Command key and select the email addresses.
- Set the Status of the itinerary note by selecting one of the following:
- Normal – Note is sent as email to selected recipients.
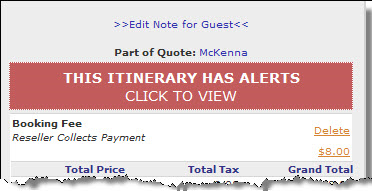
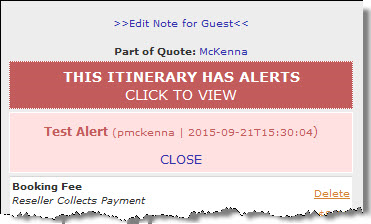
- Alert – Note is sent as an email to selected recipients and appears as an alert within the Itinerary window when the itinerary is retrieved by any agent. Alerts are listed in red on the Itinerary Notes tab.
- Deprecated – Note text appears with strike-through that indicates that the note is no longer valid. Deprecated notes are listed with a strike-through on the Itinerary Notes tab.
- In the Note Text box, enter the text of the note.
- To save the itinerary note, click Submit and in the Saved confirmation box, click OK. An email containing the itinerary number, note text, and hyperlink to the itinerary is automatically sent to the email addresses associated with the note and the note appears on the Itinerary Notes page.
In Agentopia, you can change the status of an itinerary note or choose additional email recipients; however, the text of a note cannot be edited and the Type cannot be changed. If a note is no longer valid, you can set its status to "Deprecated " and, if necessary, add a new note with the updated information.
Itinerary notes can only be modified in Agentopia.
- To edit a note or send it to additional email addresses, from the Itinerary Notes page, click the note’s corresponding Edit|Email button in the Action column.
- On the Itinerary Note Edit | Email window, select a new Status and/or select additional email addresses to receive the note in an email.
- To save the changes, click Submit and in the Saved confirmation box, click OK. The changes are made to the note and it is emailed to the selected recipients.
- To exit without saving the changes, click Close. The window is closed and no changes are saved.
Note: The only notes that can be modified in the Agentopia Itinerary notes tab are itinerary notes. Quote, Product, and Guest notes must be modified in the itinerary or quote windows.
You can create a quote note on an itinerary in either Agentopia or legacy Inntopia CRS. Itinerary Quote Notes are seen by the agent and appear to the guest in the quote email notification.
- From the CRS Search screen, retrieve or create an itinerary or retrieve a quote.
- If you want to add the itinerary to a quote, in the Itinerary window, click >>Add This Itinerary to a Quote<< and either select an existing quote or create a new quote.
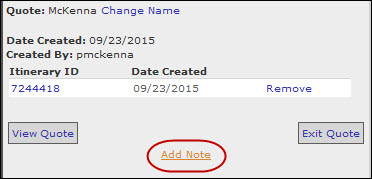
If the itinerary is already associated with a quote, in the Itinerary window, click the quote name. The quote window appears.
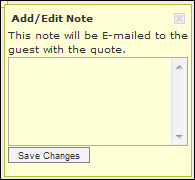
- Click Add Note. The Add/Edit Quote Note window appears.
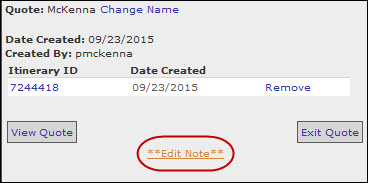
- Enter the note text and to save the quote note, click Save Changes. The quote is saved and the link text changes from Add Note to Edit Note.
- If you are using the default quote email template, the quote note will automatically appear in the quote email sent to guests.
- If you are using a custom quote email template, the template must be modified for the quote note to appear in the email. For instructions on adding the quote note capability to your customized quote email template, click here.
In Agentopia, the Itinerary Notes tab shows all notes associated with an itinerary including:
- Agent (Standard) Notes
- Quote Notes
- Product (Supplier) Notes
- Guest Notes
- From the CRS home page, click New Session.
- Leave the Open in Agentopia box checked and log a marketing source. To open the session in a new window, check the Open in new window box. Otherwise, leave this box unchecked.
- Retrieve the itinerary for which you want to view notes.
- At the bottom of the Itinerary window, click Itinerary Notes | History. The Itinerary Notes page appears in a new browser tab listing all notes associated with the itinerary, including quote and product notes.
- To close the Itinerary Notes page, close the browser tab.
If an alert has been set up for the itinerary, the alert notification is visible in the Itinerary window in both legacy Inntopia CRS and Agentopia any time the itinerary is retrieved.


