Itinerary Window
The picture below shows the information that appears in the Itinerary window once an itinerary with one lodging product has been created but not saved or reserved in Inntopia. Much of the information on the Itinerary window functions as links to either edit or add to the information shown. A numbered explanation of its main features corresponds to each numbered area of the picture.

This example Itinerary window may not exactly match the one you see with your CRS account. Some accounts are set up to perform different automated operations. For example, booking fee appears on this sample window; however, not all CRS accounts require a booking fee. Other accounts might be set up to automatically add travel insurance or other incidental charges.
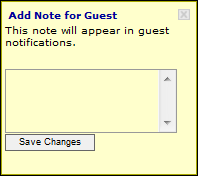
- Add Note for Guest – You can add a note to the guest with this link. Notes that are associated with an itinerary from this feature appear the on customer’s itinerary and emailed notifications.
-
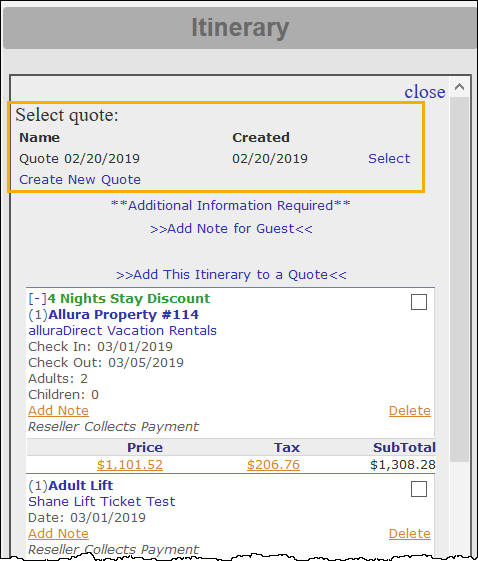
Add This Itinerary to a Quote – You can add the itinerary to an existing quote in the Inntopia System or use it to create a new quote. To add the itinerary to an existing quote, click >>Add This Itinerary to a Quote<< and select the quote name. To create a new quote, click Create New Quote.
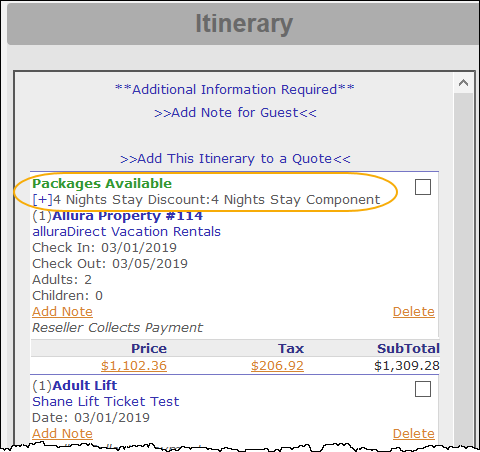
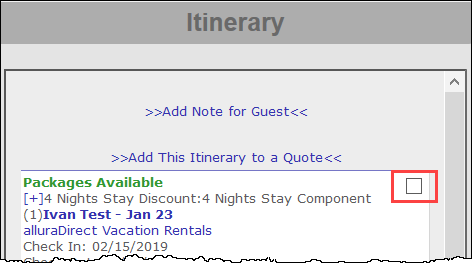
- Packages Available – If a product has package options associated with it, the package name appears above the product. If no package has been assigned to the itinerary but there are package options available to choose from, the Packages Available link appears. To view package details and to select a package for the itinerary, click Packages Available. The package name and details appear.
To add the package to the itinerary, click the plus sign
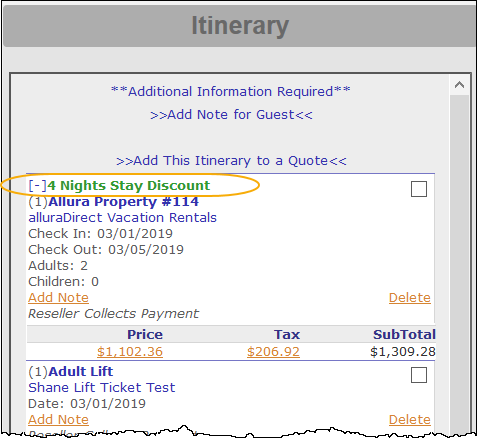
 next to the package name. The package is added and its name appears in place of the Packages Available link.
 - Mark for Deletion – To mark items for deletion on an unconfirmed itinerary, check the box next to each item you want to delete. When all the items you want to remove from the Itinerary window are checked, click the Delete Selected Items button. To delete all items on an itinerary, click Select All and then click Delete Selected Items.
Note: If an item marked for deletion is a required package or bundle component, the package or bundle and all discounts associated with remaining items on the itinerary will be removed. Required child components do not have a checkbox; to remove a required child component, you must remove the parent package or bundle.
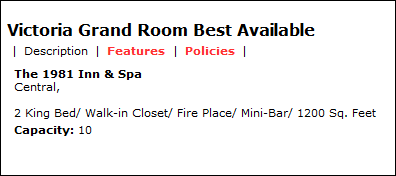
- Product Detail – To view details of the product, such as product description, features, policies, and a camera icon linking to a photo (if it was included by the supplier), click on the product name. For example, product details could describe a type of hotel room and the features inside the room such as a queen bed and coffee maker.
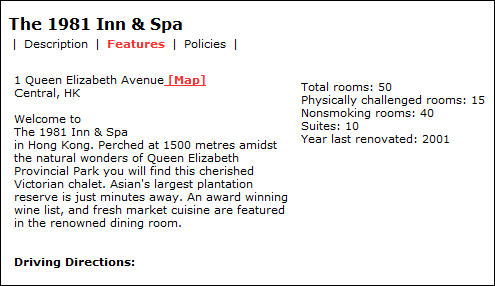
- Supplier Detail – To view details of the business or property, such as property address, description, amenities, policies, and a camera icon linking to a photo (if it was included by the supplier), click on the supplier name. For example, supplier details could describe a lodging facility and its surroundings.
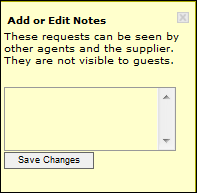
- Add Note/**Notes** – To add a note to the individual products on an itinerary, click Add Note within a product, enter text in the box, and click Save Changes. The link changes to: **Notes**.
To remove a product note, click **Notes**, remove the note text from the box, and click Save Changes.
Product notes that are associated with an itinerary from this feature are visible to the supplier and to other agents, but are not displayed to the guest on a customer’s itinerary or notifications.
- Delete a Product – This link appears under each product listed on the itinerary. You can customize an itinerary by removing individual products.
- Price – An edit function is built into the corresponding price displayed for each product. The Edit Price feature is provided to help you with customer service issues or to meet other occasional special needs for customers.
- Tax – Provides a detailed breakdown of any taxes or fees associated with the itinerary. A pop-up window shows the tax structure (percentage or flat fee) and the actual amount of each of the charges on an itinerary.
- Add a Reminder – Reminders are like virtual “sticky notes” for your Inntopia CRS account. Any time you create a Reminder, it is listed on your CRS Homepage to be reviewed when you log in. Reminders can be associated with an itinerary and are assigned a due date. Color coding lets you track which reminders are due that day (yellow), overdue (pink), and upcoming (white). Reminders that you create when logged in are only visible when using your login information. Reminders can also be created and edited on the Home page where they are displayed.
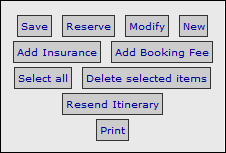
- Itinerary Status and Control Buttons – This group of buttons is used to control the status of the itinerary, as well as adding incidental charges to the itinerary. Each button is described below.
Remember, before you change a price, confirm with either your supervisor or the product supplier that you are authorized to do so. In addition, check the policies of your CRS as you may be required to add a note to the itinerary when you edit prices.
View Button Descriptions
- Save – Creates a Saved Itinerary of the product(s) in the Itinerary window. Does not reduce a supplier’s inventory and does not require payment per the Suppliers’ deposit schedule.
- Reserve – Creates a Reservation (or booking) for the product(s) in the Itinerary window. Removes the product(s) from a supplier’s inventory and requires payment per the suppliers’ or CRS’ deposit schedule(s).
- Modify – The Modify button appears in the Itinerary window only upon saving or reserving an itinerary and refers to changing any of the parameters that make up a reserved itinerary. For more information about the Modify feature, see Modify a Saved Itinerary or Modify a Reserved Itinerary.
- New – Clears the current itinerary and lets you add a different product from your search results screen. System asks you to confirm the action before the itinerary is cleared. This tool is useful when a customer is interested in a product for which they want total pricing with taxes. You can select the product from the search results screen, at which time it will be added to the itinerary, view the price totals, and to repeat the process with a different product, click New.
- Add Insurance – Adds a travel insurance product to the itinerary. If your Inntopia CRS account is set up to automatically add insurance to all itineraries when they are created, use this feature to replace insurance that has previously been removed. Not all CRS accounts sell insurance, in which case this feature is not used, but the button is still visible.
- Add Booking Fee – Adds a booking fee to your itinerary. If your Inntopia CRS account is set up to automatically add a booking fee to all itineraries when they are created, use this feature to replace a booking fee that has previously been removed. Not all CRS accounts use a booking fee, in which case this feature is not used, but the button is still visible.
- Add Sensible Weather – If your company integrates with Sensible Weather, offer to add a weather guarantee product to the itinerary to reimburse the guest in the event of inclement weather. For instructions on how to offer the guest a Sensible Weather guarantee, click here.
Note: The Add Sensible Weather button only appears on the Itinerary Window for those partners who have implemented and set up the Sensible Weather integration.
- Resend Itinerary – Sends an email copy of the itinerary to the email address entered in the Customer Profile. When you select Resend Itinerary, the email that has been sent to the customer appears on the screen.
- Select All – Marks all items on an unconfirmed itinerary for deletion. A check mark appears in each item’s corresponding check box.
- Delete Selected Items – Deletes all selected items from an unconfirmed itinerary. If a deleted item is a required package or bundle component, the package or bundle and all discounts associated with remaining items on the itinerary are removed.
Required child components do not have a checkbox; to remove a required child component, you must remove the parent package or bundle.
- Print – Creates a printable version of the itinerary. Print using your browser’s print function.
- View History – View History is available to authorized agents and managers for reviewing selected products, as well as payment history and credit card information.
Depending on your level of permissions, use the tabs across the top of the Itinerary History page to view information on the following pages:
- Itinerary History Detail – Detailed history of all selection activity on an itinerary. This information is available to all CRS agents.
- Customer Account Receivables – Details of all monetary transactions on an itinerary.
- Supplier Accounts Payable – Details of all supplier payable records. This can include money due to the CRS or money charged back to a supplier.
- Supplier Commission Due – Details of payment from the supplier applies only to itineraries in which the supplier has collected guest payment in the past.
- Itinerary Notes | History – Available only in Agentopia, this link lets you enter and edit Itinerary Notes and view the Itinerary Timeline. You can also view the legacy version of itinerary history.
- Itinerary Notes are itinerary-specific notes agents can use to communicate with each other within an itinerary.
- Itinerary Timeline is an enhanced version of the itinerary history that includes a chronological timeline of each action taken on an itinerary.
- Legacy Itinerary History is a detailed history of any confirmed itinerary in your Inntopia account.
