About Agentopia
Note: The primary Agentopia screen has been updated with a new look and feel. As we work to update our documentation and learning resources to align with this update, you may still see images of the prior version of Agentopia throughout Inntopia Help and InnovativeU.
There are two distinct parts of the Inntopia CRS. The first is the CRS Home Page, used to access most of the administrative functions. The second is the CRS search screen, or Agentopia.
Agents can personalize their instance of Agentopia by resizing and/or dragging the panels to different positions on the screen and then saving their particular layout that automatically opens with each search session.
Agentopia is the feature agents use the most and must know the best. From the Agentopia screen, you can:
|
|
|
|
|
|
|
|
|
|
|
|
|
|
|
The main features of the Agentopia screen are shown below.
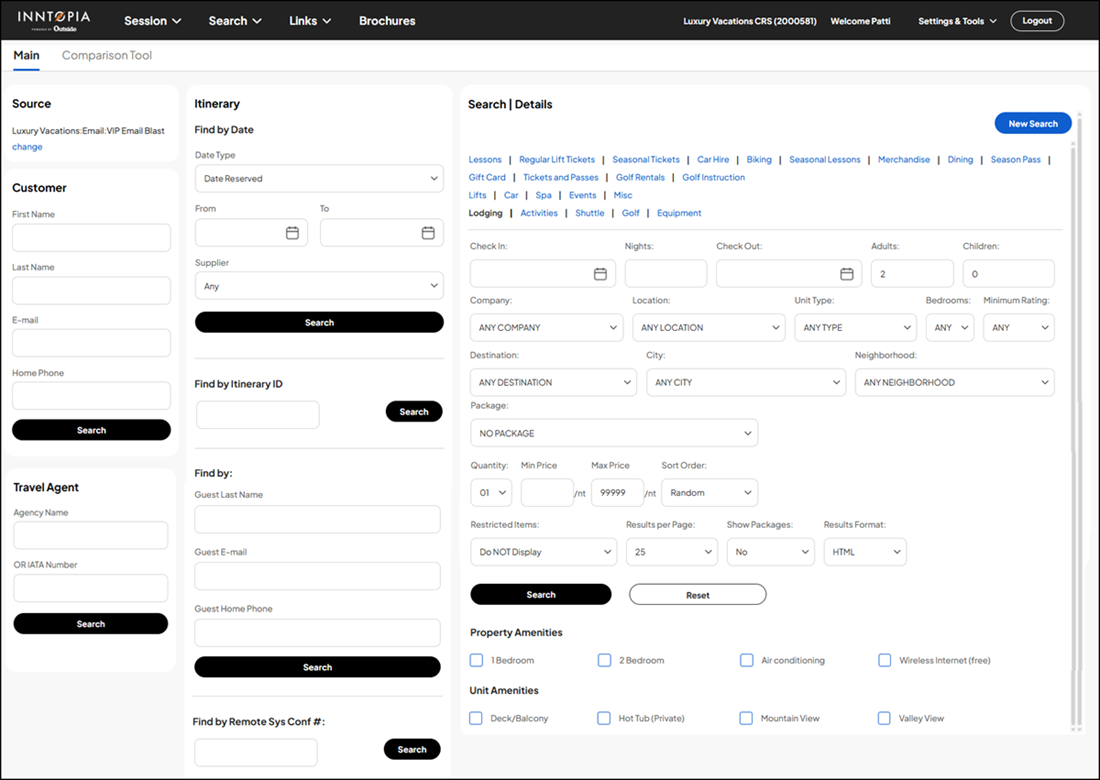
 Show Me Panel Descriptions
- Source – View and set the marketing source of a search session.
- Customer – Locate and manage customer profiles using the Customer window.
- Travel Agent – Locate and manage travel agent profiles using the Travel Agent window.
- Itinerary– Find, modify, and reserve itineraries for customers.
- Search/Details – Search for products and select various options to narrow your search. Lodging is the default search screen, meaning it is the one you see every time you start a new CRS search. To change the type of product search, click the various product types.
Show Me Feature Descriptions
- Session – Begin and end sessions and set the marketing source of a call. You can choose to open a session in a new window or use your existing window.
- Search Type – Select the type of search you want to perform or create a Wildcard product.
- Links – Links to helpful web pages that provide information that agents can relay to customers during a search session such as weather. Links open in a new window letting agents use them simultaneously with their current search session.
- Brochures – Brochures are no longer supported in Inntopia CRS.
- Account Name and ID – Identifies the CRS account in which you are working.
- Welcome – Click to manage your user settings such as password, email, and phone number.
- Settings & Tools:
- Save Layout – Save a customized CRS Search layout. If you have customized the layout of your CRS Search screen, you can save the layout for your next search session.
- My Settings – Manage your user settings such as password, email, and phone number.
- My Reminders – Set reminders for customer follow-up, mailings, etc. Reminders appear on your CRS home page until the task has been completed. Overdue reminders appear as pink.
- Switch Accounts – Switch to another CRS account.
- View/Report Issues – Report new or view issues you’ve opened in the INNTERACT reporting system.
- Comparison Tool– Allows call center agents to compare multiple itineraries on one screen to help their customers select the full vacation that is best for them.
- Search Tabs – Click on a search tab to change the type of search you want to conduct.
- New Search – Begin a new search after an unsuccessful first attempt while remaining in the same session. This button refreshes your search options but retains your date Information without ending the current session, thus retaining your marketing source association with this call.
- Search – Launches the search process. Check-in and Check-out dates are required to run a search.
- Reset – Clears all information from the fields on the Search window.
- Lodging Search screen – The lodging search screen is the default screen meaning it is the one you see every time you start a new search.
Customize the Search Area
You can customize the layout of the Agentopia screen both by resizing the individual panels and by moving them to areas of the screen of your preference. You can resize or move the panels as often as you like. You can also save a layout that is specific only to your user login.
Note: As part of the recent Agentopia user interface update, existing saved layouts will revert to the default layout. Upon the first instance of opening the new version, agents who prefer to customize their layout must first refresh their browser and proceed to rearrange and save their preferred layout.
Resize an Agentopia Panel
- Hover your mouse pointer over the lower right corner of an Agentopia panel. The resize icon appears and your mouse pointer changes to a double-sided arrow.
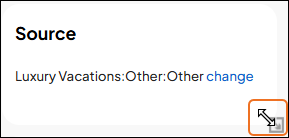
- Hold down the left mouse button and slowly drag to change the window to the size you want.
- Continue resizing windows until you have achieved your desired layout.
Move an Agentopia Panel
- Hover your mouse pointer over the top of a panel until the mouse pointer changes to a cross-hair.
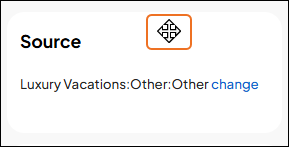
- Left click and drag the panel to the desired position on the screen. The other panels on the screen will reposition automatically if necessary.
- Continue moving panels until you have achieved your desired layout.
Save a Customized Layout
To save the customized layout for future search sessions, from the Settings & Tools drop-down list, click Save Layout. The layout is saved and will appear the next time you log in.
